Sunday, December 31, 2017

Looking Back at 2017

Looking back over this year I managed to finish 10 projects and one crochet. Again 2 more than last year! Maybe I'll have 12 finishes next year.


One amigurumi this year again. I will have more next year as I have two friends expecting a baby in the summer.


This year I learned that:

I am still in love with whitework techniques. I did more Punto Antico but also tried two new techniques: Italian drawn thread and Hedebo.


Absolutely love beading and even tried my hand at creating my own design with the little pouch.

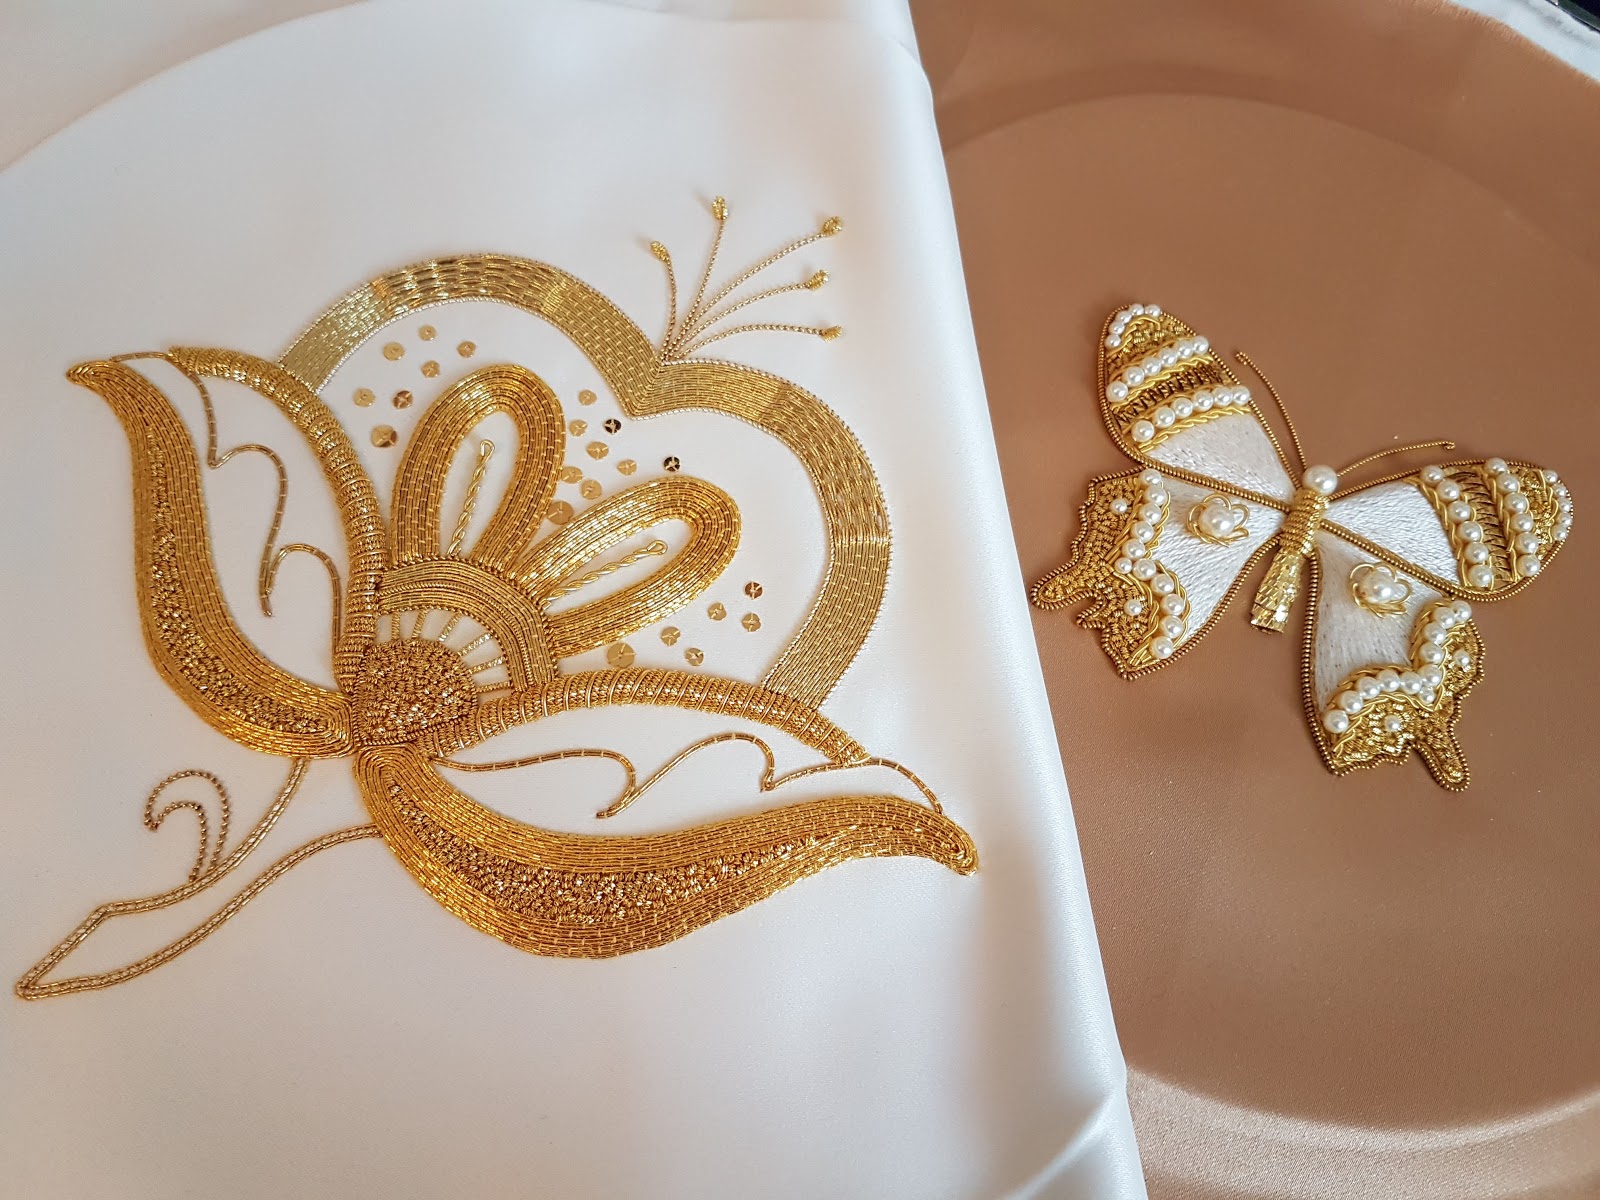
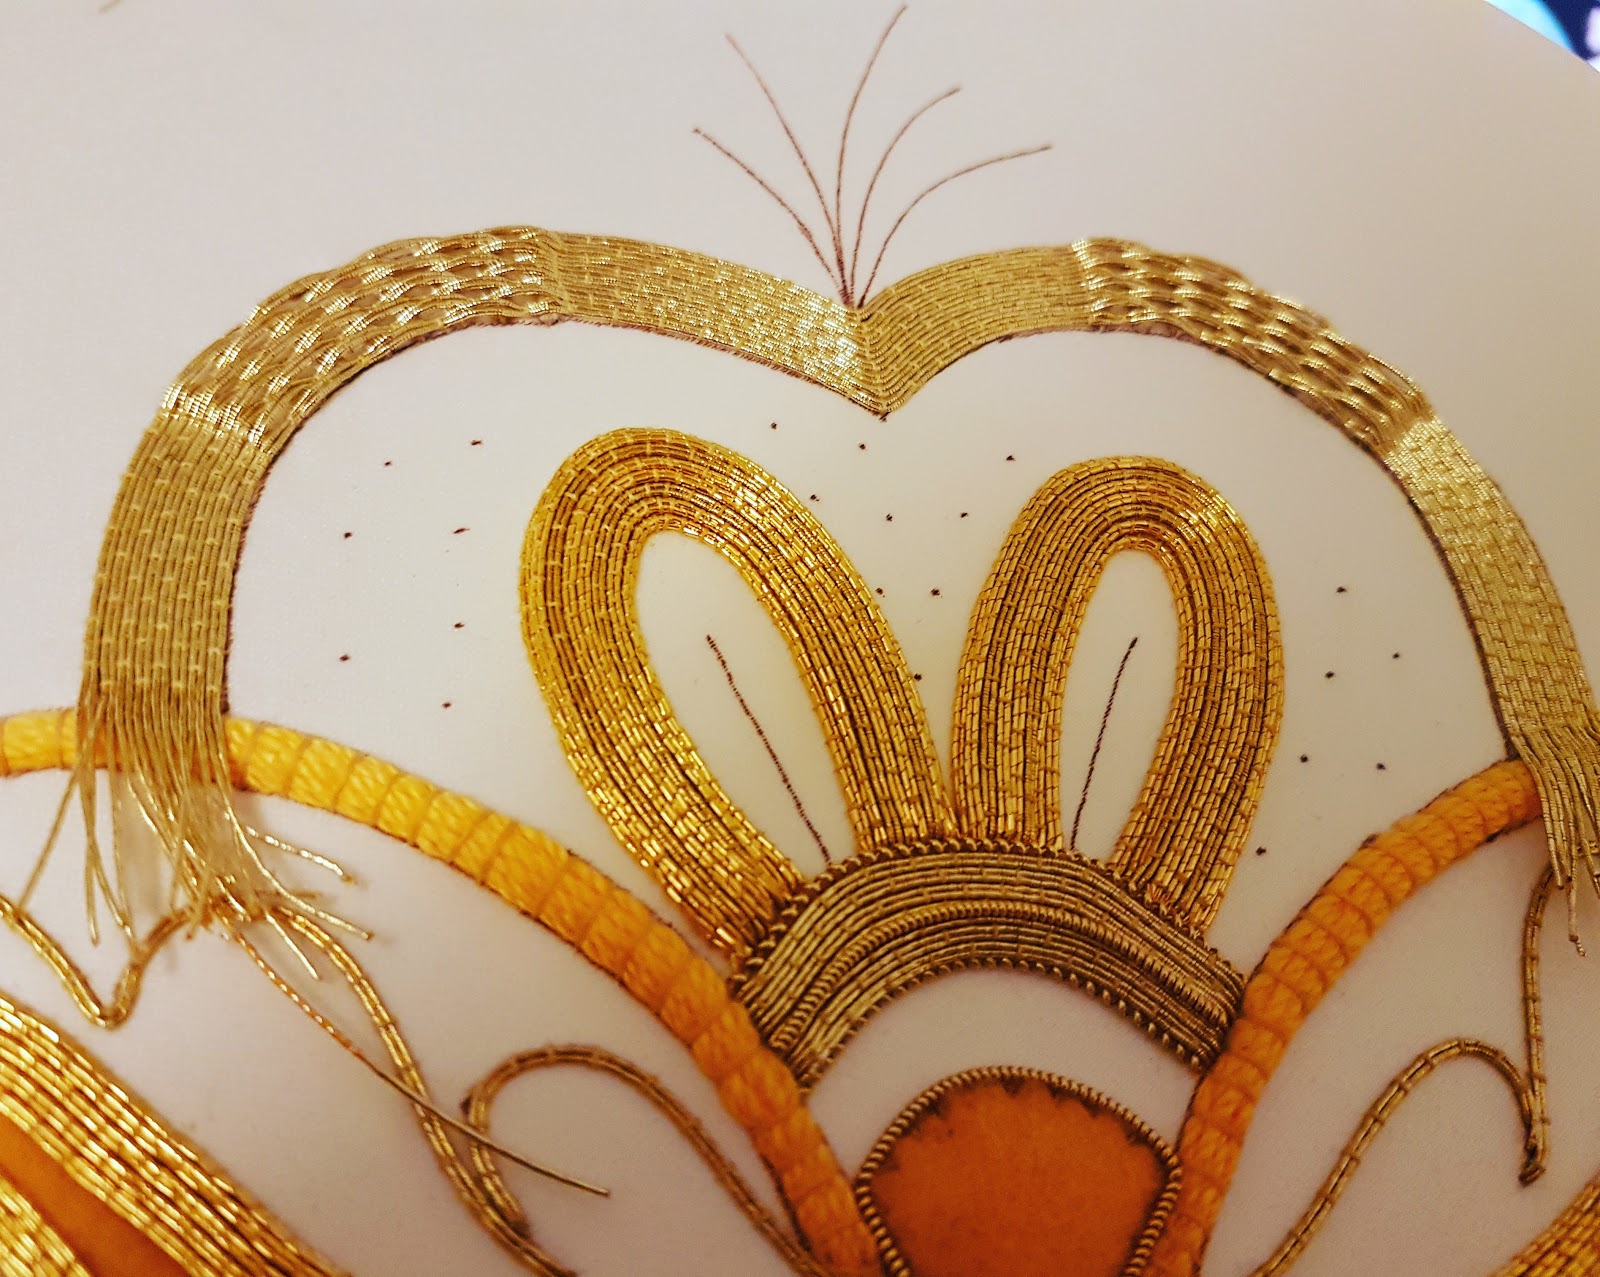
I've added goldwork to my list of favorite techniques. I did 3 projects this year and I would love to do even more in the future.

I have quite a few WIPs leftover. I will need to look at some of these and make some decisions on whether I will actually work on them at all. I realized this year that cross stitch no longer holds my interest the way it used to, which you can see from the dismal progress on Tracery Dragon and Bramble and the Rose.


To keep with the tradition, I will be stitching on Bramble and the Rose on the last day of the year. So I will have at least one update for my oldest WIP next year ;) As for the others we'll just have to see what the new year will bring.

Wednesday, December 27, 2017

December TUSAL Finale


Hope everyone had a good Christmas. I've been keeping busy with a new project that I will share with you all in the new year. If you want a sneak peek, I've been posting pictures over on my Instagram account.

I'm posting my TUSAL report very late as I wanted to take a snapshot at the end of the month of December so that I can start the new year with an empty jar. This year's jar doesn't look as full as last year, but that could be because I was mainly stitching with sewing thread. In any case, both have been emptied ready for the new year of stitching. 


I've already written my blog posts for the year in review and the goals for next year. Both of these will be published automatically Sunday and Monday. In the meantime I will be on a stitching marathon. Have a happy New year everyone!

Thursday, December 14, 2017

Pinterest

Today I want to talk about Pinterest. We all use it and we all love it. It's a great way to bookmark and save pictures to go back to in the future. It's a great mood board tool to find inspiration when designing. However, it's also a cesspool of copyright infringement.

I was going through my emails this morning and opened up one from Pinterest. They often send those "we think you might like these pins/boards" emails, which is fine as I often find some new stuff in there. But then I saw a picture that looked very familiar. It was Lucy Barter's Craftsy design, but not any of the ones I'd seen before on the Craftsy page. This one was stitched on cream fabric. After a closer inspection I realized it was mine. Which is fine because it just means more exposure for my blog. However, the pin itself says 'uploaded by user' with no reference or credit to my blog. This means that whoever stumbles onto the pin will never be referred back to me or any of my social media accounts. This also means that they will also never know who stitched it and whose design it is. They are not only stealing credit from me but also the rightful owners of the designs.

It might be that the person doesn't know how to properly pin pictures from blogs, I've seen other pins on their board that do point to the correct locations but many more that do not. So here is a little tip for when you try to pin an image from a blog post:
  •  make sure you've selected the title of the post so that it loads the page with only that post. 
  • pin the image that you want from that post
By doing this, the next time you click on the pin to open the image's source it will take you to the appropriate source and not to the main page. This is something that I always do when I want to pin something and ensure it brings me back to the correct page.

I've put in a request to Pinterest to remove the pins and that's all the action I will do for now. However, if it happens again I will have to take drastic measures. And believe me it won't be as just a watermark because I know from other bloggers that it's useless.

Not the post you were expecting from me I'm sure, but it had to be said :)

Monday, December 11, 2017

Another Sort of Finish

Yes, another sort of finish, because like my other completed projects it still needs to be "finished" into it's final form. But for now we can still admire the sparkles.

Last week was another long week at work where I had no time or energy to do any stitching. Luckily things will start slowing down now that we're getting closer to the holidays. I work in software development and as we get closer to the holiday season, we implement what is called a code freeze. This means that there is always a rush right before to make that final deployment into production. Afterward, it's a little more relaxed. For me, last Friday was when it all ended. This meant I could finally get back to stitching.

Since both my whitework and goldwork pieces were finished it was time to put all my concentration on my beadwork piece. The last time I touched it was last weekend after finishing the goldwork flower. I was able to put in some time on it and finish a row of petals.


Between Friday and Saturday, I managed to finish stitching all of them.


The final touch were these hexcut beads. In our kit, we got extra black Czech beads (the ones used in the outline) and we were expected to use the same ones in between the petals. However, the original model used hexcut beads in dark navy. We spoke to our teacher about the possibility of making a substitution and she who okayed it. I decided to go with a dark green but I suspect there might have been some dark teal mixed it as I kept finding them in there. That's okay, it just makes the piece more interesting.


Here is what the final design would look like with all the different beads. The picture isn't that great as I took it at night. My camera had some problems focusing. Much like my eyes! I love goldwork and beadwork, but sometimes my eyes have a hard time focusing because of the glare. Does anyone else have that problem? What did you do to solve it?


An overall look to the piece.


And here's the back. It's always important to inspect the back on bead pieces for any stray loops. If there are any, they need to be anchored down as it could cause issues later. A bead might snag and get pulled out of place.


Next step is to gather all the supplies I need to finish it into an eyeglass case. That will take some time. I'm hoping to do it over the holidays. In the meantime, I will be catching up on my other older WIPs. I have between now and the start of the holidays to do that. This means there will be no new starts until then (I have to be very firm with myself on that). Not sure what I'll have to post, so content might be very random ;)

Monday, December 4, 2017

Craftsy Goldwork Class - Part 5

I did promise you all a finish this week and I'm here to deliver. Last week when I showed you pictures, I only had the chipping (or chip work) left to do. This technique is my favorite as it's very similar to beading. Your beads in this case is small pieces of bright check.


I like to keep this technique for last or at least after all the cutwork is completed. This way, whatever pieces didn't fit right during the cutwork I can then cut into smaller pieces and use in the chipping. This will help make sure you have enough in your kit to finish. In this case, it worked out just right. All I had left at the end was this tiny piece of bright check.


The very last technique on this piece are spangles.  It helps a lot to separate them by size, below I have large, medium and small. I had a hard time differentiating between the medium and the small as there isn't much difference in the size.


The spangles are applied using a single thread with a couching stitch. One thing I realized when I got to this point, I wish I hadn't marked off the dots for the spangles like they had in the design outline. If I hadn't, I would have been able to put more or less spangles and move them around. Since mine were marked with ink, I had to hide them with the spangles.


And here it is, all done! I was lucky enough to finish it in the morning while there was still light outside.


A few close up photos. I love the mixture of the different couched threads and the cutwork.


A few comments on the class, design and kit:

  • the class is excellent if your just starting out or even if you've already done some goldwork. Sometimes just reading about a technique isn't enough and you need a demonstration. Not all of us are lucky enough to be able to take a class with a teacher and this is a great way to have access to one remotely.
  • the design is lovely, it has a combination of the major goldwork technique (padding in felt, soft string and hard string, couching and plunging, basketweave, cutwork, s-ing, chipping, spangles). It's a great way for beginners to dip their toe in. The design itself is not very complicated, but the combination of the different metal threads used together gives an intriguing effect. This piece is a great sampler for me to go back to and study in the future when I will want to design my own pattern.
  • the kit I have somewhat of an issue with. I guess at this point you can consider me an intermediate embroiderer in goldwork. I didn't do any unpicking and I was very careful when I was stitching not to be wasteful. However, I still ran out of the passing thread and have what amounts to nothing left of the bright check and Japanese thread. The rest of the smooth purl, pearl purl and spangles I can re-use in another project. When I ran out of the passing thread, I chalked it up to a mistake when my kit was put together, but after having so little left of the bright check it worries me. If I was an absolute beginner, I don't think this kit would have had enough for me to finish if I had made mistakes, in the cutwork for example which is the hardest technique. 


With this, I've just finished my second goldwork piece in my planned trio. I will be starting the last one sometimes at the end of December. So while all of you will be doing some last minute shopping and celebrating the holidays, I will be setting up my piece and stitching away :)


Thursday, November 30, 2017

Craftsy Goldwork Class - Part 4

Last Friday, I received the passing thread Lucy Barter was kind enough to send me. I had to be good and finish Hedebo Enchantment before I could start but I didn't waste much time once it was done. She sent me two bundles of passing, I'll have extra to play with.


First order of business was to finish my basket weave. Based on pictures I've seen of Lucy's finish there should be eight rows of passing to fully cover the arc. Some places were filled by the time I got to the sixth row, but you really need eight to fully cover the design lines.


No more plunging! I was really happy to reach this point. Above and below the basket-weave, I couched over stretched pearl purl.


The instructions said to only wrap the bottom one with thread, but I decided to do both as I liked the look. There was more overstretched pearl purl at the top with a piece of looped bright check. It gives it a lovely contrast.


From here on out, everything that is left is considered cutwork. This is where the metal thread is cut to size before being embroidered. The first technique is s-ing. It's basically a stem stitch with a quarter inch piece of smooth purl. I love this technique, it gives such a lovely texture and look to the piece.


This next part is what cutwork is all about. I did a tiny bit of it on my butterfly back in March and Foxy a little bit more on his tail, but nothing like this flower. I did find that as I went along it was getting easier and easier to do. I initially drew diagonal lines on the string padding to help me follow the line, but I quickly gave that up.


Usually if your string padding is the same all the way through, you can measure a piece of check or smooth pearl and just cut the rest the same size. Since mine tapered off on each end, I couldn't do that. I had to measure out every single piece. Below, you can see where I marked off my smooth pearl for cutting. To mark off the smooth pearl and bright check you just lightly press with your finger.


This area of the flower is worked alternating between smooth pearl and check. Doesn't it look pretty?


Now that I'm so near the end, I'm taking a few steps back to really look at the piece. I love the choices that Lucy made, especially where she alternates two different types of metal threads, like the Japanese and passing, and the smooth pearl and bright check. The piece really glimmers and shines because of it.


I'm almost done with the piece, I saved the best for last: chipping! I started yesterday and the felt in the center is already filled in. Tonight I will work on the left side.

Tuesday, November 28, 2017

And Done!

I did work on my hem this weekend as planned. The hem was stitched a little differently from the hem on my Italian runner but the concept is still similar.

First step was to cut off the excess fabric. The design specified how many threads to count out. If you look closely you'll notice that a thread is missing. This acts as a channel to make sure I cut my fabric straight.


Here is my fabric all cut and ready to go.


I finger pressed the fabric making sure to keep five threads for my buttonhole. Normally you would use an iron but I couldn't with this fabric. The humidity from the iron could shrink the fabric as it's real linen. It was also better to do it by hand since my fold was so small. I wanted to make sure it was accurate going all around. Once I finished going around, I unfolded the edges and cut off the corners at a diagonal.


 I refolded my hem and put in pins to keep it in place.


Now I was ready to start. I had to get used to this buttonhole. The Hedebo buttonhole is similar to the buttonhole we use in Hardangar except we're coming in from the back. This adds a little twist to the thread.

Hedebo Buttonhole
Hardanger Buttonhole
It went much faster than I expected. By Friday night I had hit the half-way point and Saturday morning I was able to speed through the other half.


Here is my piece all finished. It's still very wrinkly at this point. I'm just waiting for more specifics on the materials I need to gather from Jette and then I'll be washing and ironing my piece. I also need to buy a pillow and backing fabric. So it's not completely finished, I still have a few hours to put into it.


Jette was very generous with her kit. Here is what I had left from the threads that were included in my kit. I have plenty to start and finish another Hedebo piece. Just need to get my hands on linen fabric.


Since Hedebo Enchantment is done, I've already pulled out my next project to finish. I decided to go with goldwork and am well on my way. I wouldn't be surprised if Monday I will be posting another finish ;) I'll try to publish an update post sometime this week so I don't overwhelm you with information later.

Friday, November 24, 2017

Almost there

For the past week or so, I haven't really been up to stitching. Work has really been draining what energy I have that all I felt like doing was sitting with my Kindle. Whatever stitching I did do was all concentrated on Hedebo Enchantment. (If you're reading this by email, click on the link to open it in your browser).

Last time I showed you the large drops with the pulled thread pattern. The center circle and the smaller drop are a little different. The circle is actually cut open and secured with a buttonhole edge. You can see it in action below.


The small drops are stitched the exact same way as the circle.


I had some trouble getting them all to look uniform and I'm still not a hundred percent happy with them, but that's okay.


The small drops have an extra step to finish them off. This technique is called needle lace. If you're familiar with Hazel Blomkamp's books she uses this technique a lot in her designs and even has a book dedicated to the technique.

The blanket stitch around the opening acts as an anchor. A line is then extended from one side to another and back. This is where you then start to needle lace. It's basically blanket stitching in the air. It's very fiddly, you want your line to be taught but not too much you distort the sides. Your stitches need to be tight but not too tight and they have to have enough space to breath on the line.

Note: If you ever decide to try this out, don't do it in white your first time. It is very hard to see your stitches. Also, don't try it with linen thread. Linen thread is not as smooth as mercerized cotton, so it will sometimes snag on itself. The first time I ever tried this technique was in a class with Hazel and she had us using DMC Special Dentelles in colors.


So here is my center all done. I finished it yesterday and was so excited I jumped right into starting the hem. I will be working on that this weekend and hopefully I will have a "finish" to share with you next week. It won't be 100% finished until it's been turned into a pillow, but it will take me some time to gather everything I need.


Monday, November 20, 2017

November TUSAL


Since I've only been working on three projects this month, there isn't much color in my jar. It's all white! There is a change this month, I have two new ORT jars that will be added to my TUSAL report. First, is my goldwork container that has more metal threads in it.


The other is my silk ORTs container from my Japanese embroidery class. I'll have to get it a proper jar soon. I think I want to keep them separate from my regular ORT jar so I can see how much stitching I get done.


Last week I received my missing beads.


And I'm still waiting for the passing thread for my goldwork project, but I've decided since I'm so close to finishing Hedebo Enchantment that I will not work on the others until it's done. I'm so close I can taste it :)