Monday, December 31, 2018

Looking Back at 2018

Looking back over this year I managed to finish 7 projects and two crochet. I didn't manage to finish with 12 as I was hoping. In fact my numbers went down but I was working on some very complex projects this year.

I made two amigurumi gifts this year for two friends who were both expecting over the summer.

I didn't do as much whitework as previous years, spending most of my time on goldwork and completing four pieces.


Still in love with beading. I hoped to do more this year but Hanabatake took the bulk of my time. It still needs to be finished into a case though.

I still have some WIPs leftover as always. I never did cleanup that section, instead I added my bouquet which I hope to finish this year. I've put in some progress over the past few days and finally figured out those cords, but there is still lots to do.


I also added a new Mirabilia piece to the list in the last month. I've been putting in a few hours every day so it has seen some progress.


To keep with the tradition, I will be stitching on Bramble and the Rose on the last day of the year. There is still hope I will meet at least one more goal this year.


December TUSAL Finale


The last TUSAL of the year! I'm posting my TUSAL report very late again as I wanted to take a snapshot at the end of the month of December so that I can start the new year with an empty jar. This year's jar is looking nice and full. 


I've been keeping two other ORT containers, one for goldwork and another for my silks. These two won't be emptied for the new year, but I do plan on emptying the silks container once I've completed the bouquet.

I still have to write posts for my year in review and 2019 goals. As of the new year I will be introducing two new projects (maybe three if I'm good). If you'd like to follow along, you can see my progress on my Instagram account where I will be posting daily.

Sunday, December 30, 2018

Finishing Hoops

In between working on the bearded iris, I took the time to finish Mr. Blue and Tansy Beetle for hanging.


For Mr. Blue I wanted to do something a little different. I didn't like the look of the back of Foxy unfinished the way it was. So I decided to try a new finishing method I saw on Instagram. I looked through my fabric stash and found this piece of blue with white swirls.


I originally bought it to bead the swirls thinking it would make a pretty beaded pillow. The swirls would be an excellent practice for stitching clean curves. For now, it will make a lovely backing. I attached it using a ladder stitch.


Mr. Blue is now ready for hanging.

I wanted to do the same with Tansy Beetle but didn't find a matching fabric in my stash. I'll keep on the lookout for the perfect piece and also one for Foxy. I did shop for a pretty ribbon to hang Tansy.


Both pieces are now hanging on my cork-board. There is still a few spots for other ornaments. I will be on the lookout for that perfect piece to hang there.


I have one more piece to finish off and it's Hanabatake. I'm so close! I've attached the zipper and I finally finished the piece that goes inside the case this week. Now I just need to sit down and attach it. My goal is to finish before the end of the year. So at the time that I write this, I have two more days. Wish me luck!

Saturday, December 29, 2018

Bearded Iris Completed

Hope you all had a lovely holiday with your friends and families. I think I forgot to mention that I would be off from work for two weeks over the holidays. I'm taking advantage of the off time to finish a few projects and get ahead on others. One of which is the Bearded Iris. The last time I showed this piece I had put in the veins on the petals. I wasn't sure that I would like it once it was finished but I guess I should have put more faith in Alison.


As soon as the petals were outlines with gold twist, everything just fell into place. I still would have preferred a different color for the petals than this beige but it looks much better now.


The last step was to put in the beard of the iris. It was kind of weird, we had to overstretch a strand of bright check and then crumple it up. I would have never thought of doing this one my own.


I spent a whole day just doing cutwork for the stem. I had a hard time with the angles and unpicked it a few times. It's stitched with three kinds of purl and the bright check purl kept throwing me off as it's bigger than the other two purls.


I normally love chipping but I found this a little harder to do. Random is not something my brain does easily and in this case I had to do it with three different purls which increased the complexity. To help I took a break to work on the little bud before going back to finish all the chipwork. Sometimes a break helps things along.


Here it is all done. I finished it around noon on a sunny day, so I was able to take nice pictures. You can really see the color of that velvet and it looks lovely with the gold.


I'm hoping to take it to the framer sometime next week since I'll still be off work and will have time.

Now that this piece is finished, I can now spend all my time on my Japanese embroidery piece. I still have lots to do and only a few days to do them before the new year comes. Once the new years rolls in I will be starting brand new projects.

Monday, December 17, 2018

Japanese Embroidery Phase 2-3 - A new beginning

I can finally share with you my kit for the next phase in Japanese embroidery. I mentioned back in September that I had picked Hiogi as the next piece. We placed a group order at the beginning of October and got it at the end of the month.

I got a little extra something for me, a pair of professional Japanese scissors, called nigiri-basami in Japanese. This will be my gift for finishing phase 1, so it will stay packed until I do. It will be my carrot to finish the piece.

If you're curious to know what a 1000 CAD worth of Japanese embroidery material looks like, here it is. It's basically two kits. Japanese embroidery is not an inexpensive hobby. As you move up the phases, kits get more and more expensive. Most of the cost is from the fabric, since as you do more phases you'll need to buy less silk reels and metal threads. Many colors come back and by the time you get to phase 9 or 10 you will have accumulated stock.


Back to my next piece. I ended up having to buy a second frame. I figured I would need a second one regardless for the future as I want to pursue Japanese bead embroidery, the frame cost is not that expensive and they are can be used for any large project. So it's a good investment. We spent the whole day on Saturday putting it on the frame and double lacing it. It's not often that we need to frame pieces so we had to refresh our memories. It's all ready to go, I'm just waiting on confirmation of what we're expected to have ready for our class in the spring.


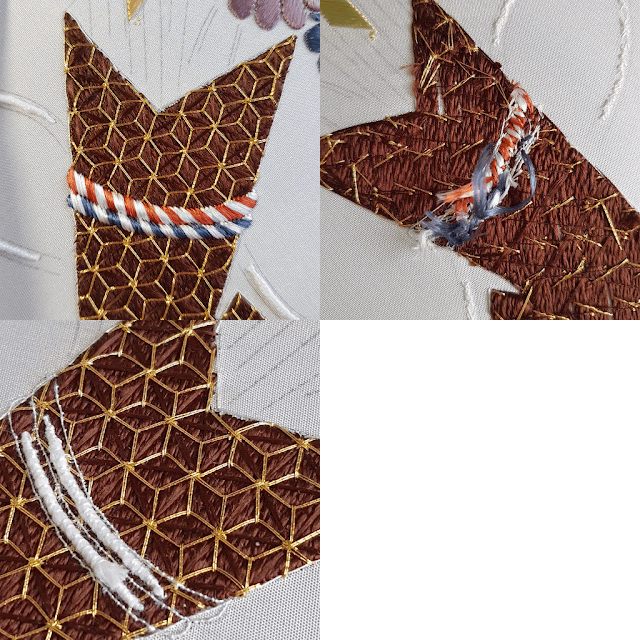
Now that I've covered the next phase, I can give an update about the present phase... it hasn't moved forward. In fact it moved backwards. My last progress didn't sit well with me, so after consulting my group I decided to remove the cords on the bouquet. I spent Sunday morning unpicking them. I made a little surgical error snipping the threads at the front, so I flipped the frame and finished unpicking from the back. It wasn't anything major and easily fixed.


I wasn't planning on trying the cords again on Sunday, but I still had the afternoon so I made a second attempt. The second attempt didn't go any better than the first.

I sent a picture of my progress to my friend and she suggested working on a different area of the piece for now. She also suggested doing some counted work as a change. Like me, she finds surface stitching stressful, so maybe a switch would work. It's funny she mentioned that because three weeks ago, when I started getting frustrated with the cords, I had already started a new WIP. I set up the Mirabilia kit I bought for my sister's birthday and have been stitching on it every night for about an hour or two. I forgot how addicting cross stitch could be.


Back to the phase 1 piece, I think the best course of action for now is work on the last pink flower, add in the gold thread for all the pinks and then go back to the cords. Maybe not the cords on the wrapping paper, but the cords on the other side that don't have a curve. It could possibly help me get into the groove.

Monday, December 10, 2018

Disappointing Weekend

Ever have a weekend when you're just not happy with your stitching? Not because your skills are not up to par but the circumstances are stacked against you. This weekend I worked on the same projects, the Bearded Iris and the bouquet.

On Saturday I added the rest of the veins on the petals. The more I work on this woven metallic mesh the less I like it. It looks nothing like the piece Alison Cole stitched, and it's really hard stitching through it. I have what feels like huge holes where my couching stitches are. I'm also working blind since it's not opaque, putting in punctures where I don't want them. I know, I know, it looks fine when you look at it from afar, and no one will be pressing their faces to the piece. I just can't help being disappointed in how it looks. Maybe I will like it more when I put in the outline on the petals.


Sundays have become my day for Japanese embroidery. As planned, I worked on the cords wrapped around the paper. I had to unpick it twice before I got the angle right. Not only do I have to get the right angle for the cords but I also need to stitch through multiple layers of stitching. Not to mention try to avoid the gold thread at the front and back. It seemed like every time I tried to bring my needle up I hit a metal thread. Small blessing, I managed to avoid having to stitch through the center of any of the motifs. Not all of us are so lucky.


While stitching the blue cord, my angle was better but I can't help but feel like something went wrong. Does it seem like my blue cord is smaller than my red? Think I can get away with saying the red cord is going over the blue?


I'm really disgusted with my stitching, it looks so sloppy. At the same time, I'm not sure I can do any better if I redo it. I'm going to wait and see what feedback I get from my group at our next Japanese embroidery meeting, which is this weekend. So all in all, it's progress even if it's progress I'm not happy with.

Friday, December 7, 2018

Tansy Beetle - Finished

If you'll remember, last Friday I introduced Tansy Beetle. I had to stop working on this project because I ran out of beads for the head. Kate was really quick to respond and I received my replacement beads on Tuesday.


Now that I had the beads to finish the head, I was able to move onto putting in the legs.


The beads for the legs are so pretty. I love the flower sequins. The green beads are called SuperDuo that are Czech glass seed beads. I initially put them in with the metallic foil facing up, but quickly realized my mistake and flipped them. I want the green side to be face up to match the green in the sequins on the body.

To make sure my legs were symmetric (or as close to symmetric as I could get them), I worked on all the legs at the same time.

(click on the post to see the animation below)


Here is my beetle all finished. This design was a very quick stitch. It took me about 7-8 hours to stitch from start to finish. A little too quick a stitch for me considering the cost of the kit, but I really like it and I wanted to encourage Kate Tume's design business. I would be very happy to buy another kit in the future.


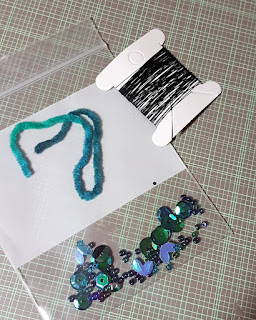
I do have some beads and sequins leftover. I'll have to think of what I can make with them. They're too pretty to set aside in a drawer. Maybe a brooch?


I plan on finishing Tansy in a hoop to hang on my corkboard with Foxy and Mr. Blue. The hoop that came in the kit is bigger than I need, so I need to buy one. I'll share a picture once they're all hanging together.


If you're interested in making your own Tansy Beetle, Kate still has kits in stock here. Speaking of kits, I got another "small" project kit in the mail this week which could be my next mini project. I'll share more in a future post.

Wednesday, December 5, 2018

Revisiting Japanese Knots

Since my post on knots, I received a lot of questions about Japanese knots. Many of you were curious Since I received so much interest on Japanese knots, I thought I'd make a video demonstrating how they are made.

(click on the post to see the video below)


In order to be able to use this method, the thread needs to have an S-twist. To find out more about the difference between S and Z twist, Mary Corbet has a great article explaining the different twists. DMC thread has an S-twist, so technically this technique should work with any of their threads. I decided to test this theory out. The one on the left is a DMC cotton a broder and the one on the right is a sashiko thread by Olympus. I was able to create knots with both threads and they come out really great.

So now, I leave it for you to try out. I'd love to see your attempts and what you think of this technique. Would you start switching French knots for Japanese knots? I certainly will.