Friday, July 30, 2021

JEC Special Class - Peach blossoms with small bird

Happy world embroidery day! Sorry for the long absence. I meant to post this a few weeks ago, but work got in the way. I also got my second vaccine dose, so now that I can see friends I have less stitching time.

A little bit about this new piece I started. It is called Peach blossoms with small bird and is inspired by a scroll painting called "Touka shoukinzu" by Japanese artist Itō Jakuchū. It was originally supposed to be a special class for the group going to Japan for the JEC Nuido tour, but was cancelled due to COVID. Their bad luck is my good fortune. As virtual classes were so successful, the JEC decided to not only offer the class online but to also open it up for all students who are phase 7 and above. As you know, I'm no where near phase 7 but with permission from our teachers they were willing to allow lower phase students to join.


The class was taught by a professional embroiderer in Japanese with Arata-san translating over three days. We started off with an introduction of the art piece and history of the artist. The teacher explained how he designed the embroidery to recreate the translucent effect on the flowers. 

These peach blossoms will take some work to get them just right. We're used to working on pieces that are very structured and are always striving for perfection, but here perfection is set aside for what they called "feeling".


On the second day, we had a presentation on the history of Kurenai-kai before we started covering the blue bird. This bird is a mixture of structural and "feeling".


I really enjoyed stitching the bird and ended up doing a bit more when the class was over.

The third day of class, covered a few more elements on the bird, the stems and leaves. By the last day, I was very tired and didn't attempt any stitching. I was very happy to just sit and listen, taking notes. 

Since stitching on the bird, I've set the frame aside. My goal right now is to complete the beading on Calm Flow so that I can remove it from the frame. I'm very nearly there and I just need that extra push to get it done.

Thursday, July 8, 2021

Fiber Talk Podcast no. 2

I was invited back for another episode with Fiber Talk. This time, we spent the hour talking about all the projects I worked on since the last time we met. Most of these will be familiar, with a few you will not have seen on the blog yet. It was nice to catch up with Gary and Beth.

(click on the post to see the video below)


Wednesday, July 7, 2021

June TUSAL


Still trying to catch up, so there are two posts in one day. Since I shared my post on Karahana, my ORT jar will make more sense. All that white at the top is from lacing Karahana onto the mat board. I think it's the only piece I worked on last month.

I have one more post to write and it's a brand new project to share. In the meantime, here is a picture of the curtain panel I made for my sister over the weekend. She has been wanting a new curtain and I decided to make it for her birthday. She wanted a single panel as she hated that little sliver of light that peeked between the two panels hitting her in the eyes while she works. She's such a vampire lol


Japanese Embroidery Phase 4 - Finished!

Things progressed very fast on Karahana since my last post. As we got closer to the class date, the pressure was on. Right after my last post, I completed the turnovers.


I don't normally stitch Japanese embroidery during the work week, but plunging I can do. So in the interest of saving time, I got those ends plunged and tied down. Here is a peek at the back of the piece.


The stems took a weekend to stitch and plunge. The trefoil stems are embroidered using staggered diagonal, but the longer stem is stitched using couched gold. I had a hard time at the beginning, but once I got the trick it got easier. The trick that worked for me, is not to fix my gaze straight down at the stem but to set it far. The same way you would while doing a turn driving. Not sure why that worked for me, I think it was more a psychological thing.


Here it is all done! It's a dream come true as I've been wanting to stitch this design since I saw one in person way back in 2011. As we're still not meeting in person, I ended up doing the finishing process (pasting and steaming) with my group over zoom. It was a good experience and I won't be so nervous for the next one.


I do my own stretching at home. Here I am holding Karahana right before I went to drop it off at my framer.

I decided on a gold frame with a black lacquer inner frame and no matting. I really love the simplicity of it.


The next phase covers cord techniques. Right now, I have no plans to start phase 5 until I complete Hiogi which is my combined phase 2-3. My hope is that I will complete it before the end of the year, so I will have to work hard. I really have no excuses as it's very close to a finish.

Tuesday, July 6, 2021

Bojagi & Saeksilnubi

It's been a month since my last post and I have lots to share with you, so please bear with me.

If you follow me on Instagram, you'll know I have an interest in traditional Korean crafts and have been collecting books on the subject. I'm interested in learning the traditional embroidery techniques but also what is called 규방공예 - kyubang gongye, which literally translates to ‘ladies living space’.  In other word, all crafts done by ladies in their space like sewing, embroidery, garment making,... 

Through my research on the subject, I found Young Min Lee a maker who uses traditional Korean techniques with a modern aesthetic who teaches in California. She recently offered a few classes through Tatter and I signed up for two of them.

The first class is on a technique called 보자기 - pojagi (or bojagi as the letters b and p are interchangeable in Korean) which is a form of patchwork done with silk or rami fabric. The finished piece is traditionally square and used to wrap something special. There are different words used to describe different type of pojagi. For example, an embroidered pojagi is called a subo and a pojagi used to wrap a gift is called a yemulbo, which is what we made in the class.

Note: there is another term 조각보 - chogak bo used to describe scrap bojagi made by commoners and closely associated with food coverings. I'm still fuzzy on the details on what would be called a pojagi vs a chogak bo as they can both be square and both are made of smaller pieces of fabric.


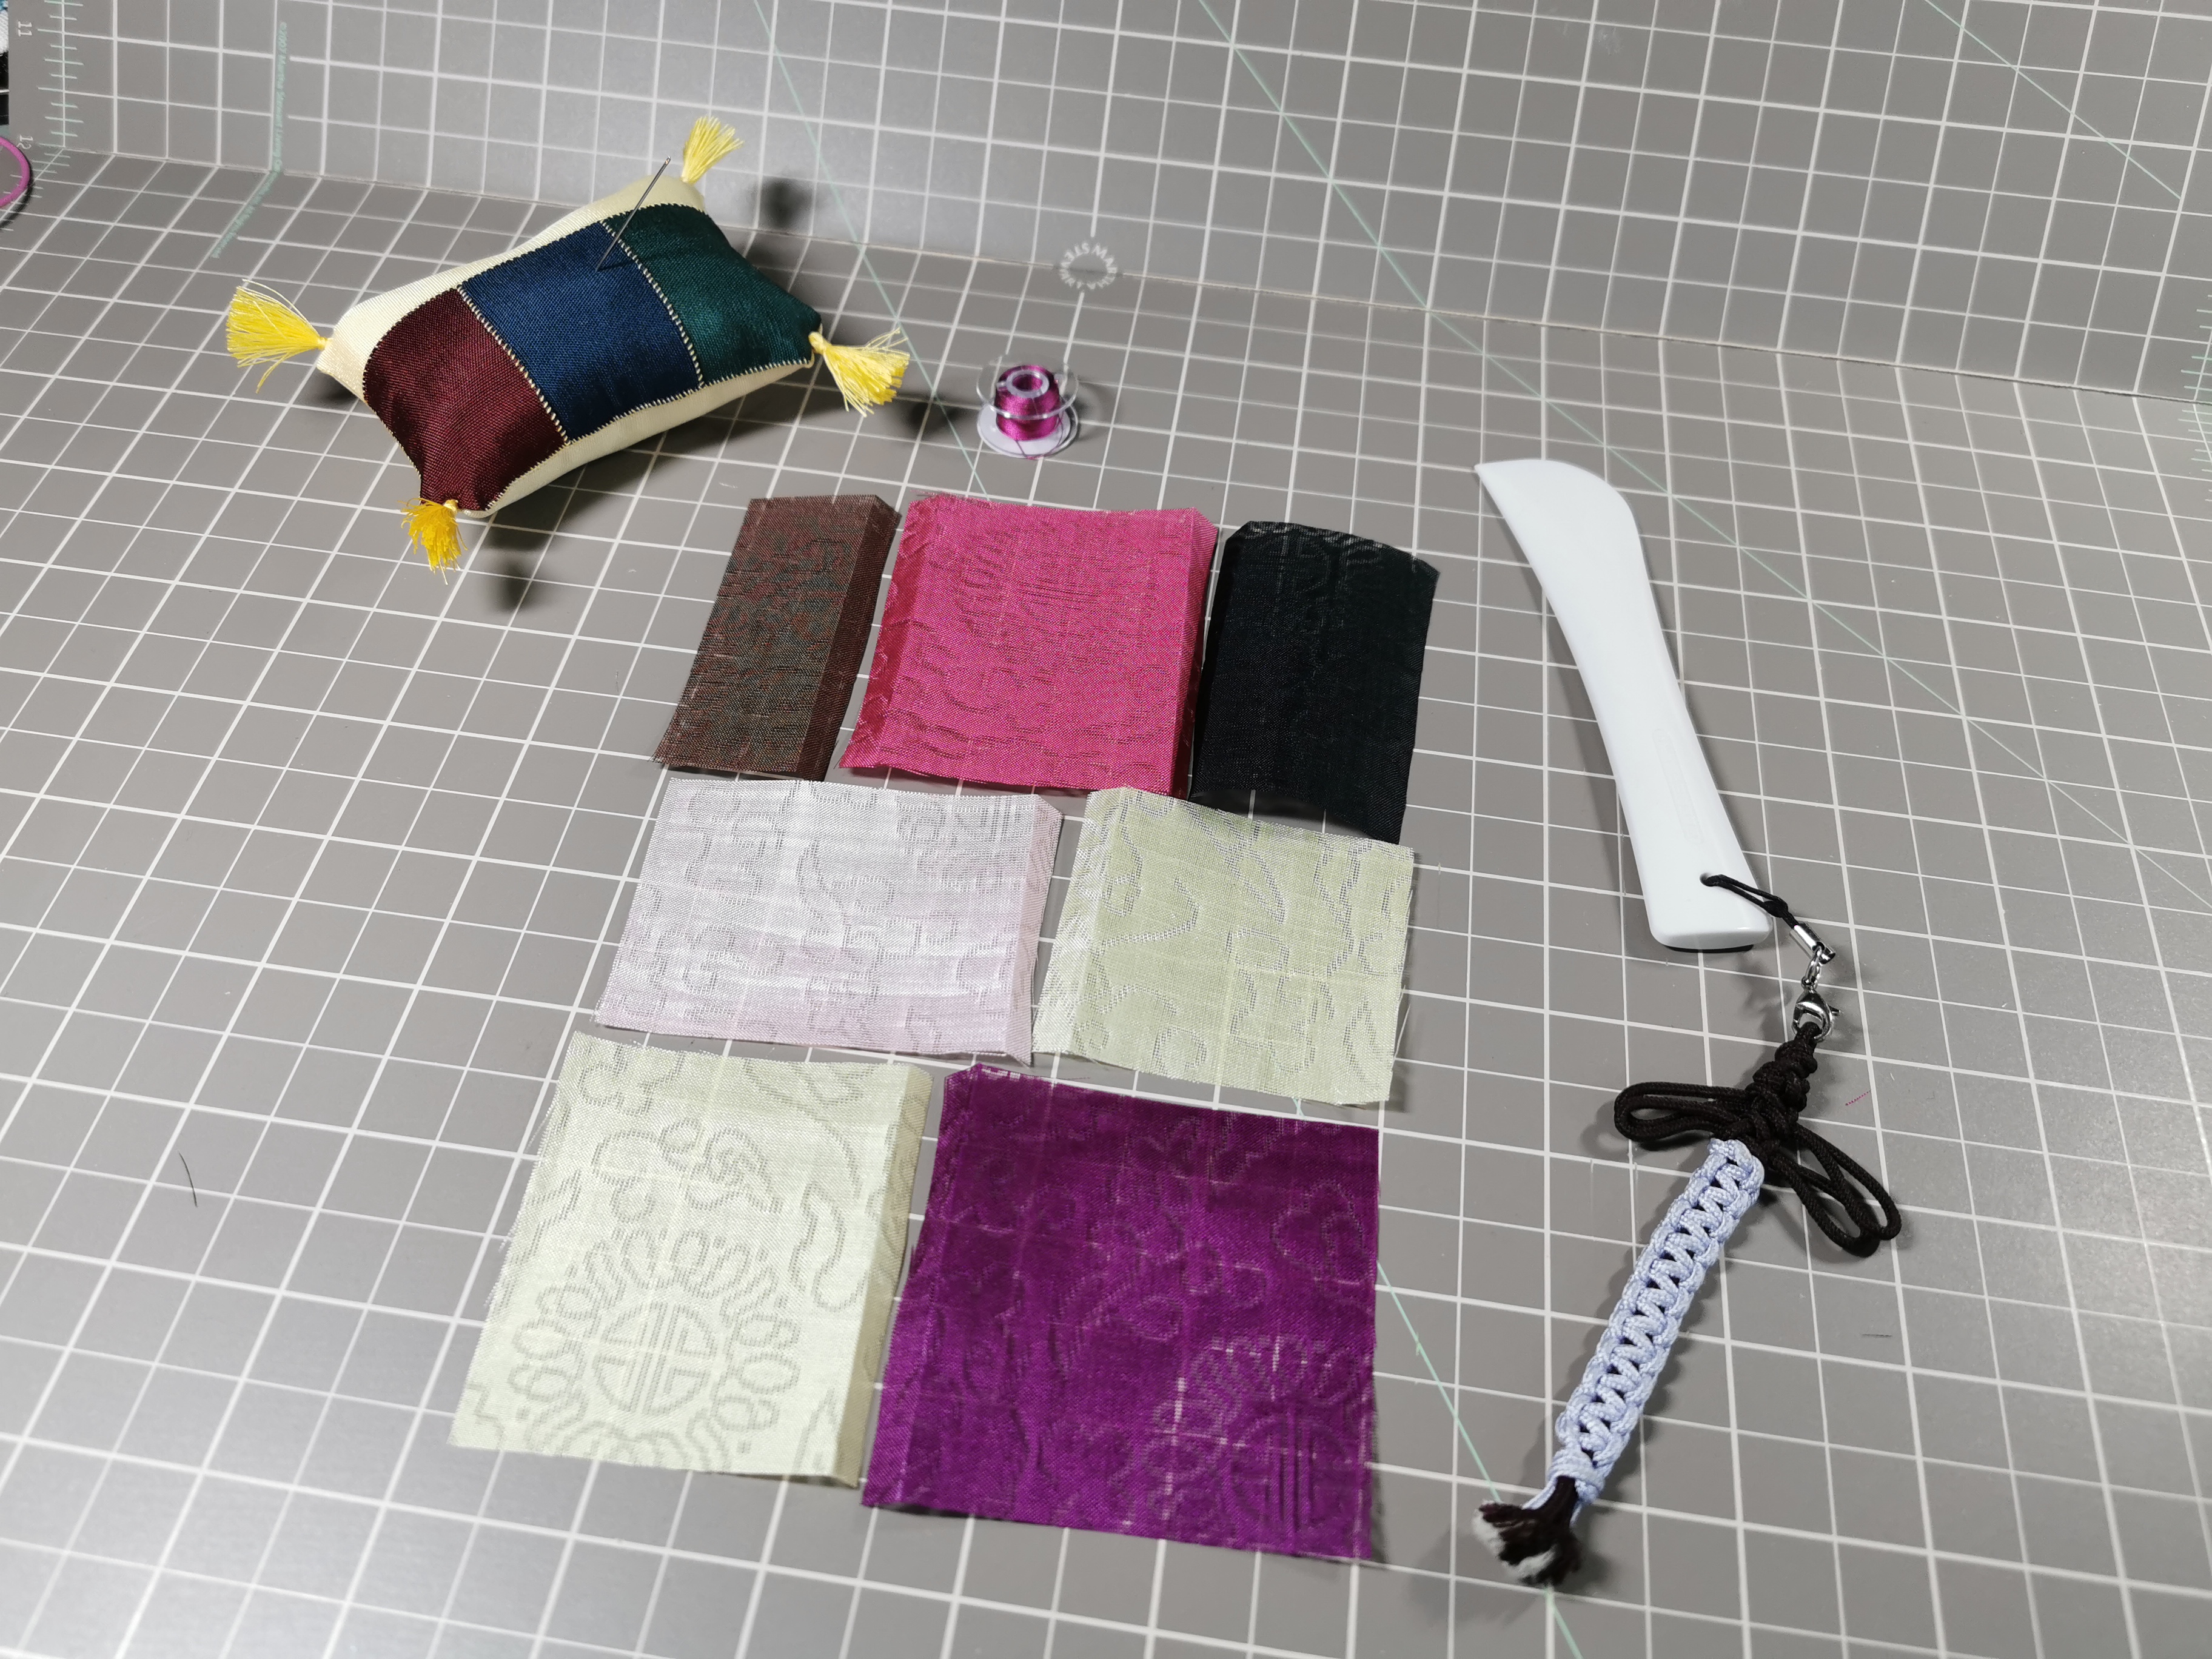
Before class started, I cut up the smaller pieces that are needed for the first block and marked out the seam allowance using a hera marker. If you're not familiar with this tool, it's a great quilting tool for marking fabric if you can't wash it. Once you mark your seam allowance, it's very easy to fold the fabric along the marked line.


In order to give us the full experience, Young Min sent us real hanbok silk fabric and thread in our kits. This is what is used traditionally, as they used scraps leftover from sewing hanbok. However, any non-synthetic fabric could be used and Young Min shared her recommendations with us so we can experiment with what we have available here. The resources that were shared during the lesson was more than worth the cost of the class.


The second class is on a technique called 색실누비 - saeksil nubi. This technique is a little harder to describe, but the closest technique we have would be quilting. However, this is not something you'd want to do on a very large piece as it's very time consuming. I was first introduced to this technique when I discovered an exhibition being held in Korea last year by Eun Banul and was able to purchase her book. I later learned she is the student of Kim Yoon-sun, the artisan responsible with reviving this craft.


Saeksil nubi loosely translates to 'colorful thread quilting'. It uses two layers of fabric, hanji (Korean mulberry paper) that is cut into strips and hand rolled into cords, and colorful threads to make quilted texture. This technique was created out of necessity to create storage for small items that could be damaged like tobacco, firestone, thimbles,... Things that could be affected by moisture as the hanji acts as an insulator. 


The stitching technique itself is not complicated, it just uses a basic backstitch. The time consuming portion is hand rolling those strips into consistent thicknesses. If you can't find hanji paper, cotton cord could also be used. This craft reminds me a little of the French quilting technique boutis, with the difference being the order in which the stuffing is done. In boutis, you quilt first and then insert the stuffing, while in saeksil nubi you stuff as you go.


I haven't made much progress on mine as I was more interested in the resources being shared but I will enjoy working on the little piece that I have. 


If you are interested in learning either of these techniques or other, Young Min routinely offers classes and advertises them through her newsletter. You can sign up through her website.