Seminar is fast approaching (27 days and counting), so I thought it was about time I reveal what class I will be taking this year. As soon as I saw this piece at exhibition last year, it was all I wanted to stitch. It's a 2-day goldwork class though by Alison Cole called Bearded Iris. The class went to lottery, as all Alison's classes do, and my name was picked. Luckily, because I didn't really want to take any other class this year.

While I was away in Turkey, I got a package from Alison with the fabric and homework instructions. The fabric is a crinkle velvet in a lovely teal color (she has it in stock at her shop if anyone is interested).

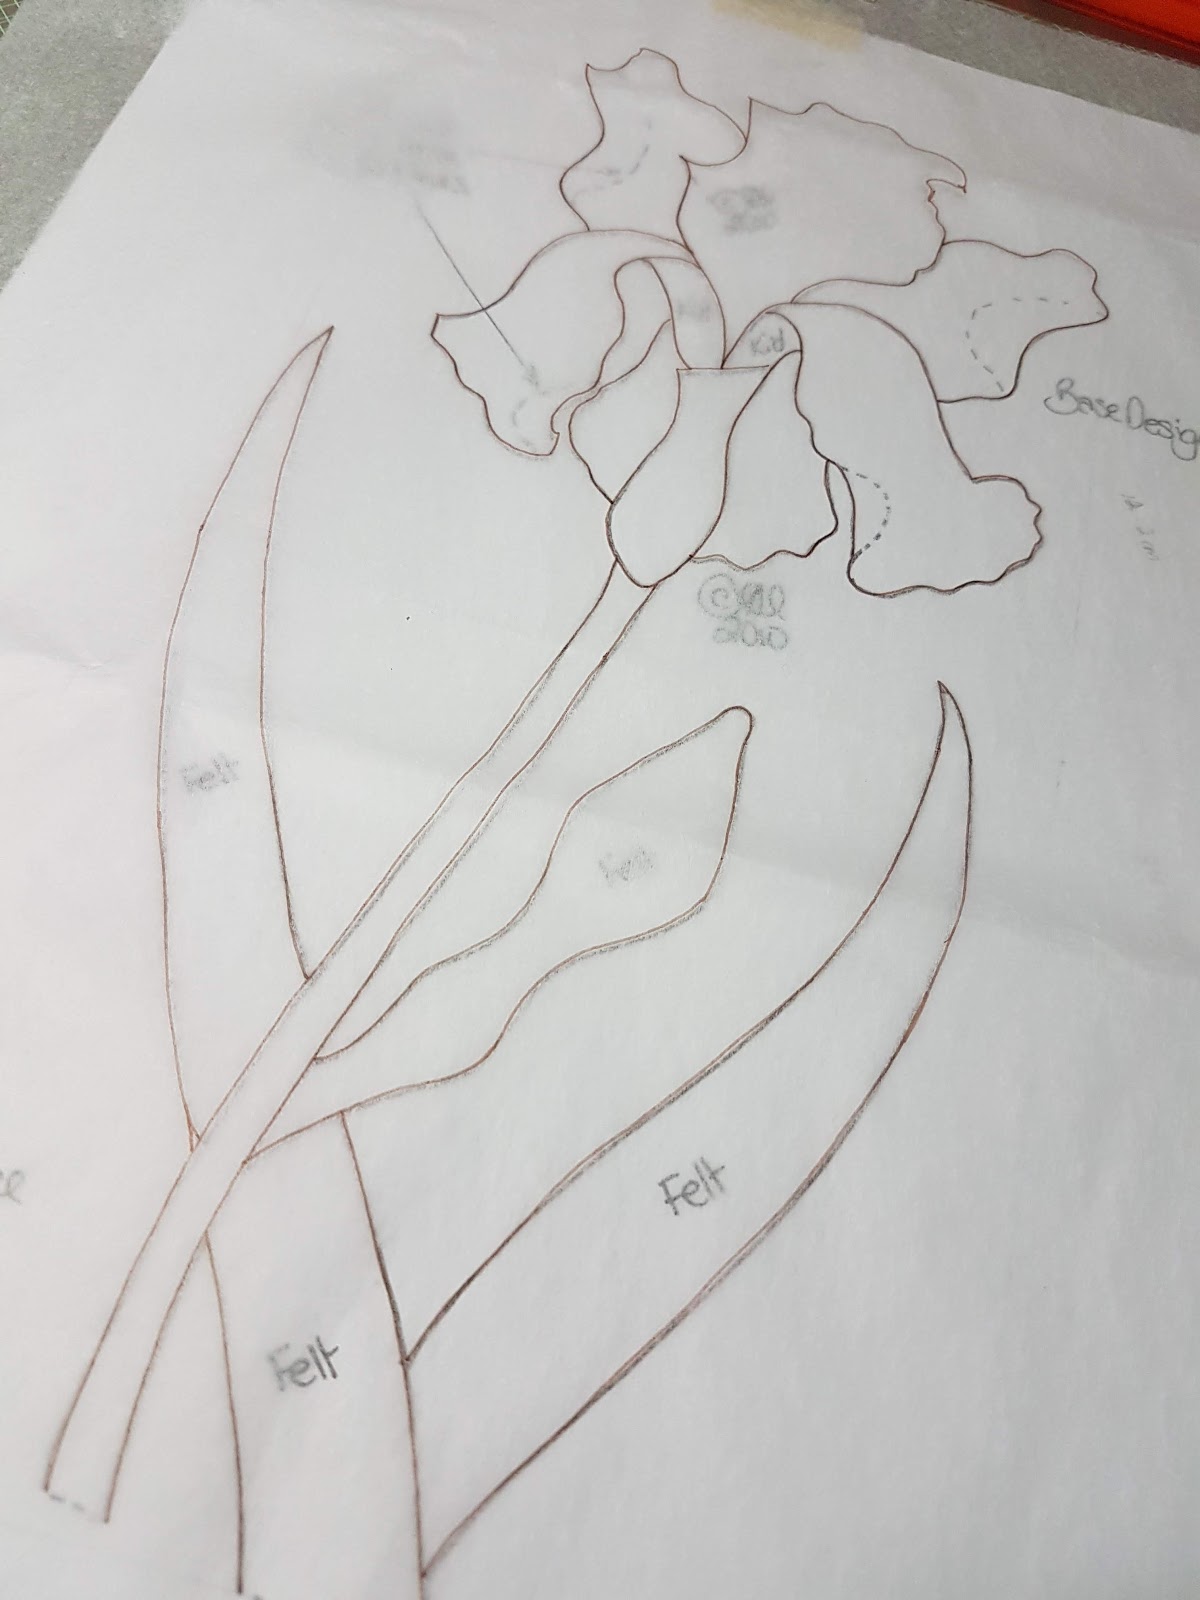
In order to be ready for class, I need to setup the fabric on my slate frame and trace the design. I'll be using my RSN slate frames for this project.

It took about three hours to do this part. It's really hard to judge if the velvet is stretched properly because of the crinkle. I'm going to have to stitch the iris sideways. If I stitch it vertically, the frame would be too long for me to stitch comfortably.

Next step is tracing the design lines. The instructions say to use the tissue paper method for this.
I've tried this method before on a smaller design. I had used an acid free tissue paper I had bought for safely storing finished pieces. I didn't want to waste the tissue paper this time around and just used the stuff you find at the dollar store in the gift aisle. Not sure I'm happy with it as it kept wrinkling and tore easily.

I'm not sure if it's because of the paper or the design itself. I just hope all the wrinkles didn't distort the design and make it harder to stitch later.

Here it is with all the tissue paper removed. It's hard to photograph against that teal but the lines are there and ready to start stitching.

Update 2018/06/21: Shirlee asked if I did the transfer from the front or the back. It made me realize that with this crimped fabric, it would have been easier to do this from the back.

While I was away in Turkey, I got a package from Alison with the fabric and homework instructions. The fabric is a crinkle velvet in a lovely teal color (she has it in stock at her shop if anyone is interested).

In order to be ready for class, I need to setup the fabric on my slate frame and trace the design. I'll be using my RSN slate frames for this project.

It took about three hours to do this part. It's really hard to judge if the velvet is stretched properly because of the crinkle. I'm going to have to stitch the iris sideways. If I stitch it vertically, the frame would be too long for me to stitch comfortably.

Next step is tracing the design lines. The instructions say to use the tissue paper method for this.
 |
 |

I'm not sure if it's because of the paper or the design itself. I just hope all the wrinkles didn't distort the design and make it harder to stitch later.

Here it is with all the tissue paper removed. It's hard to photograph against that teal but the lines are there and ready to start stitching.

Update 2018/06/21: Shirlee asked if I did the transfer from the front or the back. It made me realize that with this crimped fabric, it would have been easier to do this from the back.
That is probably the only sensible method to use with velvet. It does look gorgeous, and I am looking forward to seeing your progress!
ReplyDeleteSo nice!
ReplyDeleteThis looks fabulous. I can understand why the class went to lottery. Lucky you!
ReplyDeleteTesting comments
ReplyDeleteDid you put the tissue on the back or front to stitch it? Hardest part is the setup!
ReplyDeleteDid you put the tissue on the back or front for transfer? Sometimes the hardest part is the setup!
ReplyDeleteIt is such a lovely fabric! One thing fir your future projects - you should remove the selvedge before applying the fabric to your calico as it doesn’t stretch in the same way as non-selvedged edges.
ReplyDeleteThis is a very pretty design and I look forward to seeing you stitch it!
I didn't know that. I will have to remember it for next time.
DeleteThat is a stunning colour! Can't wait to see this flower grow.
ReplyDeleteWow, what a gorgeous design! I would never have thought to embroider on a fabric like this, but I am sure it will look awesome.
ReplyDelete