As my Goldwork Pineapple is so small and I was on a tight schedule, I decided to frame the piece myself. I definitely wanted protection for my piece which meant some sort of glass, but I didn't want to squish my stitching. The nicer solution would have been to use a frame with double mat to lift up the glass, the easy solution was to use a shadow box. I went to my local Michael's and found a size that would work perfectly. It only comes in a pack of four, but I was able to split it with a friend.
First step is measuring the inside of the frame.
Use those measures to cut out a piece of mat board.
To my shock, my measurements came out spot on. This would be amazing in normal circumstances, but in this case I need something a little smaller to make space for my fabric.
I trimmed the edges on the top and on one side to create that space. Just enough wiggle room for the piece to sit comfortably in the box.
I don't want my embroidery to come out flat, so I glued a piece of batting to my mat board.
I laid my piece on the mat and put the shadow-box over it to get an idea of what it will look like once completed.
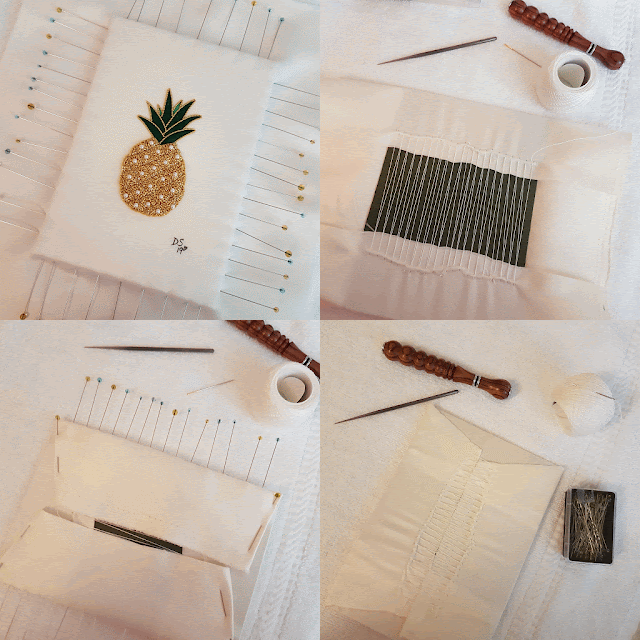
At the last minute, I decided to do something I normally never do and that's sign my work. I usually keep the pieces I make so I've never thought of signing any of them. So for the first time ever, one of my pieces is sporting a signature. It's nothing fancy, just my initials and the year. The heart was completely accidental. I put in a line that I had to quickly convert to a heart so it wouldn't look weird.
Next step was the stretching. Luckily the piece is really small and the fabric big so I was able to get this done pretty quick.
Once it's been stretched, it's ready to be popped into a frame.
In my case, I needed something to stick my piece to the back of the shadow-box. I wanted something with a little height to push my piece forward. I found this double-sided tape by Scotch. It's not archival quality and non-toxic. If my piece was embroidered on silk, I would never use this but in this case it was okay.
First step is measuring the inside of the frame.
Use those measures to cut out a piece of mat board.
 |
 |
I trimmed the edges on the top and on one side to create that space. Just enough wiggle room for the piece to sit comfortably in the box.
I don't want my embroidery to come out flat, so I glued a piece of batting to my mat board.
I laid my piece on the mat and put the shadow-box over it to get an idea of what it will look like once completed.
Next step was the stretching. Luckily the piece is really small and the fabric big so I was able to get this done pretty quick.
Once it's been stretched, it's ready to be popped into a frame.
 |
 |
My piece is ready to be gifted and I even wrote a little message for her on the back. My friend really liked it, I'm happy to say. I have a video of her opening it and I will always remember the look on her face when she got her first look at it.


It's delightful, and you did a really good job!
ReplyDeleteThe pineapple is striking and the frame sets it off beuatifully. Lucky girl to receive that as a gift.
ReplyDeleteYour finishing is outstanding! Thank you for explaining the process.
ReplyDeleteBeautiful gift! You should always sign your work!
ReplyDeleteThis looks fabulous Dima! I’ve no doubt your friend would be thrilled at such a personalised and wonderful gift. The framing looks great, and I’m glad you signed it, heart and all!
ReplyDeleteGreat tutorial, thanks for sharing. It looks beautiful framed, so glad to hear she liked it!
ReplyDeleteLooks awesome! A great way to finish a small project. I sometimes sign my work, but most times I'm just too excited to be done that I forget all about it!
ReplyDelete