Monday, November 22, 2021

Hiogi - Nearing the End

I didn't post last week but I'm still on my stitching streak. The 2-3 sessions for the cords ended up being one session. Below is my tassel fully stitched except for the couched lines and Japanese knots.


I'm getting so close to the end that I decided I needed a checklist of what's leftover. Doing this helps me plan what threads I need to make. Not the standard twisted threads but the karayori and katayori that need to be dampened and dried.


One full day was spent making threads and putting in the tassel lines. I'm realizing now I have no pictures from that but it's the same thing as the purple tassel. Below are my katayori and karayori. They're both meant to be couched and the katayori is a bumpy thread vs the smooth karayori. It's actually very pretty when twisting it with gold thread.


The clouds all have two rows of pairs of katayori couched. This helps hide the edges.


The same thing is done with the paulownia but this time with one katayori and one #5 gold thread. It's a really pretty way to neaten the edges.


Very pretty but leaves you with quite a mess. All these threads have to be plunged and tied down at the back.


The plunging is done but now I have tie downs to look forward to. My least favorite thing but it needs to be done. I finished quite late yesterday so the lighting is horrible. I'll take a nicer picture when I pull it out again.

Not long now, just a lot of couching left to do as well as that snowflake you can barely see near the orange cord. I'm looking through my notes and I put this piece on the frame December 15, 2018. It would be amazing to get it done before that date. Right on time for it's 3 year anniversary.

Monday, November 8, 2021

Hiogi - Tassel, cords & more

Two weeks ago, I set myself an objective for Hiogi. Well I met them and more!

The first objective was to stitch the second purple cord that had the color change.


Here you can see the light purple next to a twisted thread that had half light, half dark purple.  The color change is done in steps where you start introducing the mixed color thread slowly, completly replace it and then introduce your second color to finally end with just that one.


The second objective was to put in the veins on the tassel. I had previously transferred the lines using the tissue paper method using black couching silk. These lines could be put in by eye and they don't need to be very precise. At the time when I put in the black lines I thought it may have been overkill, especially as I had spent a whole session just doing that. However, when it came time to put in the karayori it really helped. So I will probably do the same on the other tassel using an orange couching silk.


The last touch comes on the "skirt" of the tassel. There is an outline of Japanese knots in light purple, I added some gold to the twist, and then a few scattered inside. The outline is easy, but how much should there be inside is a tough question. A friend reminded me that in Japanese embroidery, if you have to ask yourself if you put enough, chances are you did and should stop now.


Since I met my objective, I could go back to working inside the fan. I completed the white buds, adding in the stems. We could pick either a green or peach color and I went with the peach as it gave it a delicate look.

I was originally thinking of putting in the lines inside the fan but finally decided to wait for the clouds to be outlined. They're done using a non-stitchable gold thready and waiting will help me better judge where the gold lines should be plunged.


But wait, there's more! Since I'm doing so well, I decided to forgo working on the Armillary sphere on Sunday and spend one more day on Hiogi to start the orange cord.


The day went well, really well. I normally stop stitching around 3-4pm but that didn't happen yesterday. I stitched all day, with a break around 3pm for a nice walk and came right back to stitching. Things were going so well, that the stitches just kept flowing. 

The cord on the left is meant to be stitched with gold and dark orange with a color transition in between. I didn't particularly like the gold as I thought it was too flashy and clashed with the overall design. The kit comes with two shades of orange as the tassel is stitched with two. So I decided to use the light orange twisted with gold before it transitions to the dark orange.


The next session will be to work on the tassel as it is in the foreground while the second cord is in the background. There are a few steps to get through, so it may take 2 or 3 stitching sessions.

I'm really happy with how far I was able to get in two weekeds on this piece, especially on those cords. I'm thinking I should strike while it's hot and get phase 5 which is all about cords. Decisions, decisions...

Friday, November 5, 2021

Armillary Sphere - Lesson 3 & 4

I've been trying to be good and work on my Armillary Sphere at least once a week to try and get it moving along.

Lesson 3 is all about longitudes and latitudes. The longitudes are stitched on a curve to give roundness to the design. There is a some over and under, so we start with two curves only and start the latitudes.


For the tropics, we have the choice to either use pearl purl or do some s'ing with smooth purl. I went with the hard choice and did s'ing. It's really hard to keep a straight line, so this is where the transfer of the design is key. If it was done right, I should have a straight line. It doesn't look like it in this picture and stitching over all the metal threads I've already stitched is hard.


But I think once I surrounded the lines with peal purl it sort of straightens everything out. I hope.


Lesson 4 was very short. It's a lot of couching pearl purl and lizerine on curves. I'm really happy with how my outside circle came out. I wanted to avoid having bumps near the equator and tropics. To do that, I just made sure to end my stitches a few millimeters before the outside circle which leaves space for it.


With lesson 4, the base of the design is completed. For lesson 5, I need to recreate the band for the remaining zodiac signs. In lesson 6, the whole thing will be put together. I'm really looking forward to finishing it as it's starting to look nice.

Wednesday, November 3, 2021

October TUSAL


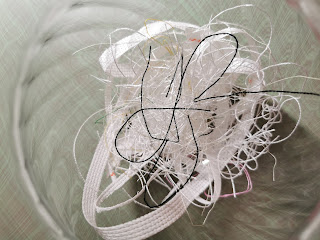
This month's TUSAL report features lots and lots of white from the English whitework sampler. Not very visible in this picture but there are also some thin strands of gold from the Armillary Sphere. I'll post my update on that piece very soon, but in the meantime here's my sampler. You can't really see the first band, but there are four of them stitched so far.


FYI, the aida is not for me. My sister wanted to do some cross stitching and purchased a kit from one of those Chinese website. It came with some horrible 11ct aida and I convinced her to switch it for a higher count fabric. I helper her set up and needed to trim the edges to make sure they were all straight.