Monday, April 22, 2019

Japanese Embroidery Phase 2-3 - Woven effect, Tie Dye & Sayagata

Hope everyone had a lovely Easter weekend! I had a very productive long weekend. I took out Hiogi and worked on completing a few of the elements we had started in class.

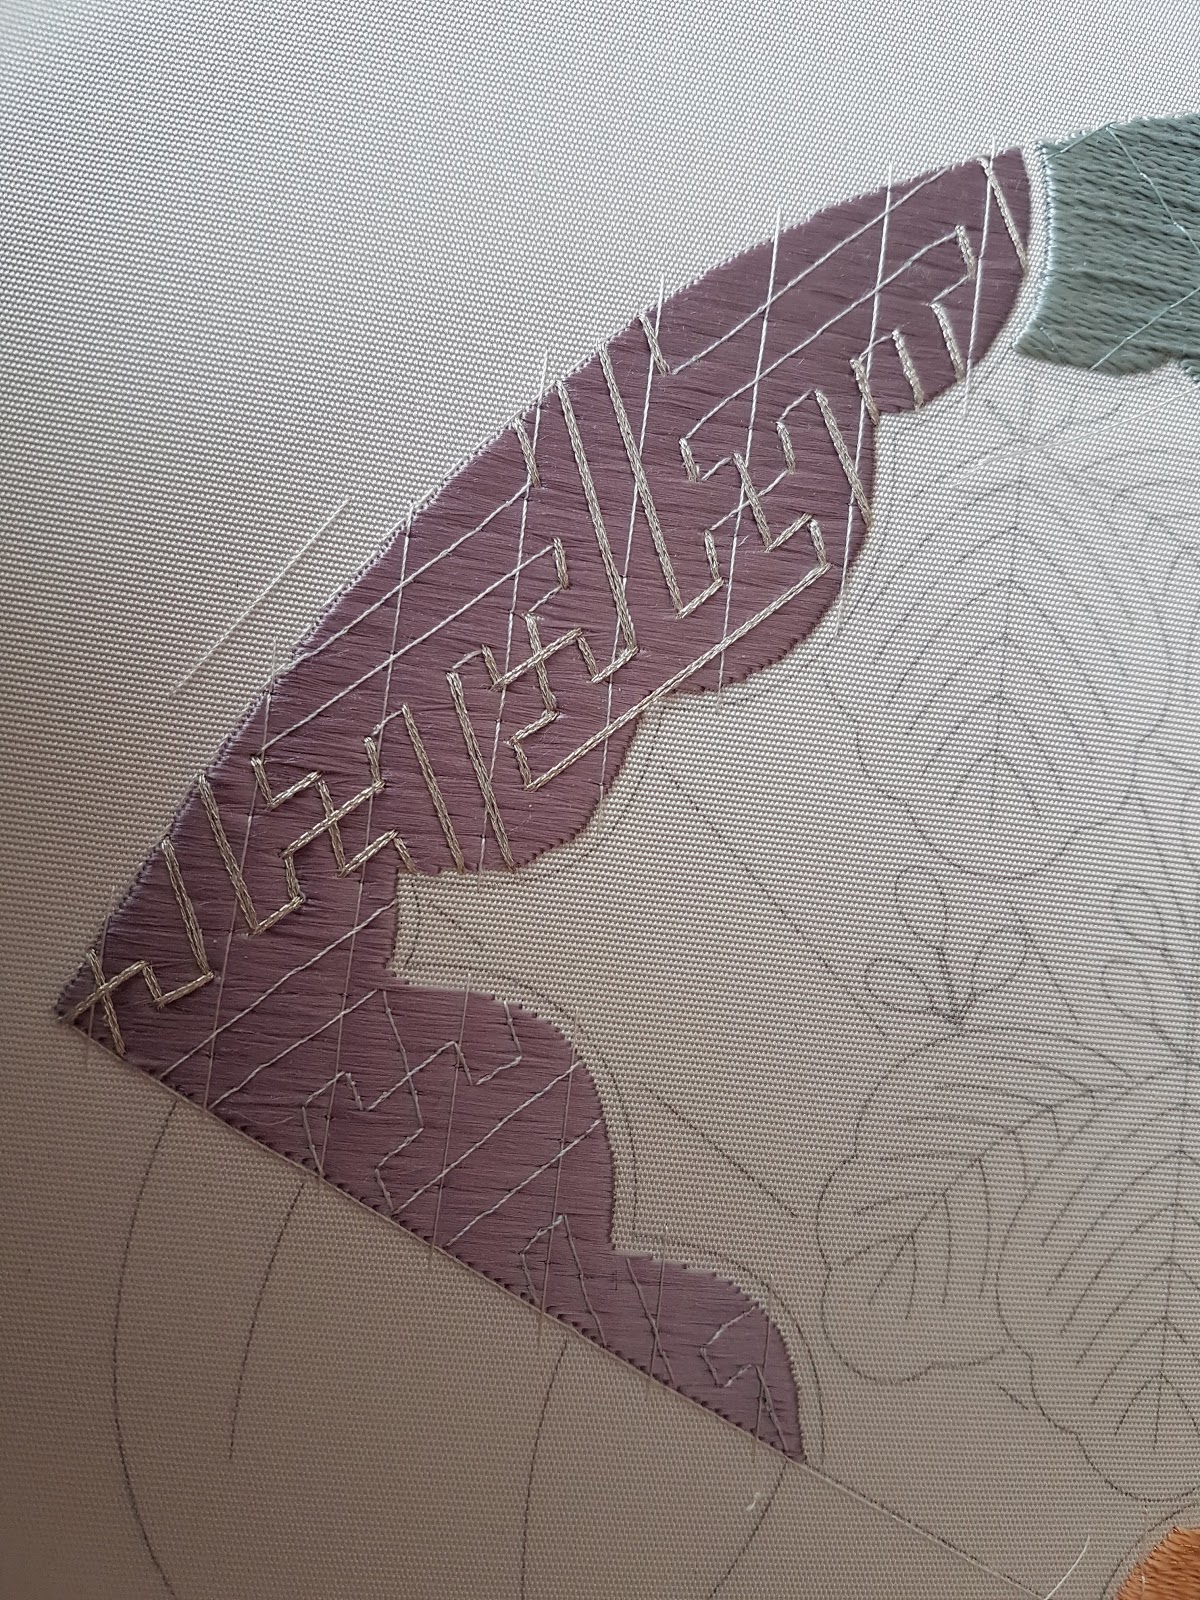
The first element is the woven effect. Towards the end I noticed there was something wrong but it's not very noticeable from afar. I think I might have made a mistake in the third step when we had to tie down the gold thread. Something to improve on for next time.


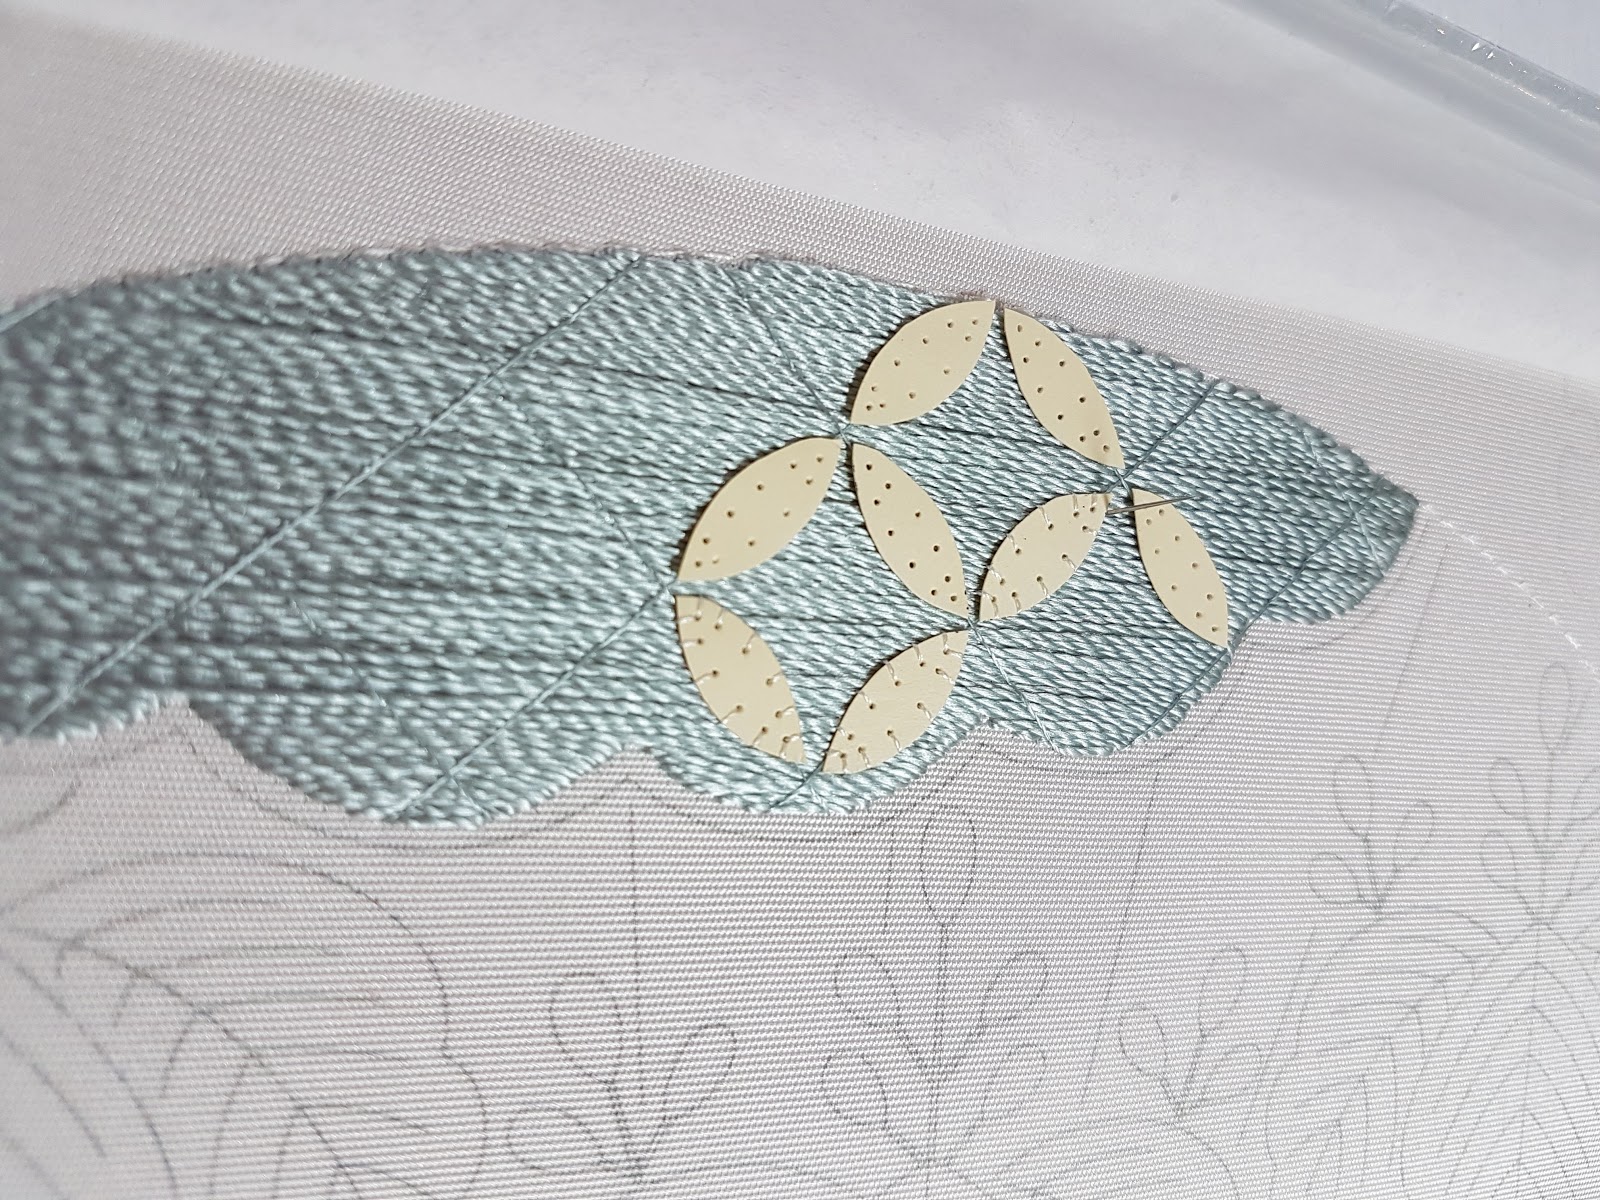
The second element I finished is the tie dye effect. Once I got going, I did this by eye. I'm surprised at how nice this came out. I've seen this technique done in books with different color combinations and they look lovely. Now I can say I can stitch it.


The last element I completed is the sayagata cloud, which was very near the end. It was only missing some of the lightning. After that it was a matter of removing my temporary holding stitches and couching everything down.


All of them need to be outlined, but that's being done in the next class I think. Still that's three elements to strike off my to-do list:
  • finish sayagata cloud
  • finish shippo cloud
  • finish the snow flake in the upper right corner
  • finish the woven effect paulownia
  • finish the tie dye effect paulownia
  • start and finish the flax leaf effect paulownia
  • start and finish the separated single layer paulownia (low priority)

I'm going to try and work on some of my other projects for a bit though. Otherwise, I will have nothing to work on during my monthly Japanese embroidery meetings.

Last week I received a comment from someone who was a noreply-comment. Nicole M. asked: i noticed on your fabric the leaves have the veins drawn in. But when you are doing your stitches, they don't seem to be used for anything. It that right? Is there a reason that those type of details are on your ground fabric when you don't seem to be using them for anything?

Here is an answer but don't take my word for it as I'm still learning. Often in Japanese embroidery designs are created by cutting up pieces and putting them together in a way that is pleasing for them. I have a few design books at home that have multiple pages of how chrysanthemums are drawn for example. You pick the shape you like (rounded or pointed petals), drawn from the side or on top,.. and combine it together with other elements to create a whole new design to stitch. The leaves you see in my piece are called paulownia leaves and that's how they draw them in Japan. You can stitch these in green to look like the leaf and put in veins (one of them will be), but it just so happens that they decided to embroider the others using different effects.

Tuesday, April 16, 2019

Japanese Embroidery Phase 1 - Finished!

In my last post, I mentioned I was going to try and join the phase 1 group on Saturday and/or Sunday to stitch on my own piece. I'm happy to say I was able to join both days.


I spent all of Saturday hunched down over my piece doing stitching stems and veins. Taking occasional breaks to watch a demonstration.


On Sunday morning, one of the ladies asked the teacher if she will cover the finishing process in the class. Normally, this is done in a purely verbal fashion as no one has a finished piece available for a demonstration. However, seeing as I was so close to the end, someone jokingly said something along the lines of "well if Dima finishes her piece today, we can have a demo".


As I only had the upper two branches, the valerian stems and some veins left to do, I was game to try and finish it. So I put blinders on and got to it. I was actually quite happy to offer it up for demonstration purposes as I was dreading this part a tiny bit.


The finishing process has many steps like doing a final inspection of the piece to make sure nothing was forgotten and cleaning it of all dusts (it has been on the frame for almost two years). These are normal steps to be expected. What's not is using paste at the back. Below you see wheat paste that our teacher cooked in the microwave.


With a pinkie finger, this paste is applied to the back of the embroidery.


The piece is then wiped at the back with a damp cloth. Now comes the fun (and scary part). You get a very hot iron, place a wet cloth on it and use it to steam the piece from below. It was cool to see the steam rising from the piece.

(click on the post to see the video below)


I had to leave my piece at my friend's to dry overnight and went to pick it up yesterday. I'm hoping to go to the framer this weekend to pick out a frame. It will be a while before I can share final pictures as I'll need to stretch it on foam core and bring it back to the shop for the final framing.

I made an animation of the piece as it progressed. If you're interested in statistics, here is some data: I started on October 26, 2017 and finished April 14, 2019. It took 176.25 hours over a period of 43 days to stitch. This includes unpicking and redoing a few elements like the cords.

(click on the post to see the animation below)


Saturday, April 13, 2019

Japanese Embroidery Phase 2-3 - Class Day 4

It's the last day of class and we still have two leaves to cover. The first order of business was to finish the flat silk foundation. 


Once that's done, I can start the steps to product the tie dye effect, or shibori in Japanese.


It's a lovely effect but I'm not sure how I feel about ruining the perfectly smooth layer of silk I had at the beginning. Someone commented on Instagram that it looked like spilled quicksilver, which was a really good description.


Unfortunately, I didn't have time to start stitching the third leaf. We did spend a few minutes discussing how to stitch it, so I should be okay. I'm not worried though, if I have questions I can email the teacher or leave that leaf for the next session.

Now I'm sure many of you have counted and there are not three leaves but four leaves inside the fan. The reason why we left it out, is that we should already know how to stitch it. It's the exact same pattern we stitched on the paper wrapping of the bouquet and is called flax-leaf effect.


After four days of class, we have lots of work ahead of us before the next session which will be in the fall. Here is a list of things I'd like to get completed before then:
  • finish sayagata cloud
  • finish shippo cloud
  • finish the snow flake in the upper right corner
  • finish the woven effect paulownia
  • finish the tie dye effect paulownia
  • start and finish the flax leaf effect paulownia
  • start and finish the separated single layer paulownia (low priority)
There is one more session this weekend for a group of students starting phase 1. I will be joining them either today and/or tomorrow with my own phase 1 for some quiet time to finish it.

Friday, April 12, 2019

Japanese Embroidery Phase 2-3 - Class Day 3

On the third day of class, we decided to work on the paulownia leaves that are within the fan. Each leaf is stitched using a different technique. The leaf we decided to start with requires a foundation of twisted thread. I decided to make mine extra long so I wouldn't be constantly starting and stopping. 


We spent the morning putting in foundation.


Once the foundation is put in, there are four additional "layers" that go on top. I had time to start the third layer, so this leaf is well on it's way to be completed.


Here is how it looks so far. Once it's been completed, it will look like it's been woven with a hint of gold peeking out.


Since we wanted to cover the other two leaves the next day, we needed to get moving on putting in foundation stitches. The second leaf is covered in flat stitching, my favorite as no twisting is required.


I was able to make good progress before we stopped for the day. At this point, I can confidently finish the blue paulownia leaf on my own.


Thursday, April 11, 2019

Japanese Embroidery Phase 2-3 - Class Day 2

On the second day of class, we went right into the shippo cloud. A shippo is formed by a group of four ellipses. As we're stitching on top of an existing foundation, we don't want our stitching to sink and get lost. Padding is applied to help with that.


I had the opportunity to use rice past glue for the first time. The texture is quite nice and not as annoying as craft glue, which runs everywhere. I will have to use it more in future for finishing projects.


The ellipses are glued onto the foundation using the grid I put in as a guide. To ensure they don't shift, even though the glue is pretty solid, the ellipses are couched into place.


We were meant to stitch in at least one ellipse, but my mind wouldn't work. After several frustrating attempts, I decided I wanted to move on and the teacher was ready to do so anyways.

This next technique is going to be a favorite of mine. It's called fuzzy effect and it's so pretty. I still need to put in the tacking stitches which will hold everything down, but I love looking at it. I can't wait for phase 8 (I'm a long way off) as the piece is done entirely with fuzzy effect.


We still had time at the end of the day, so I made another attempt at the ellipse. This time things clicked a little better and I was able to make a decent attempt. Now I just need to figure out what color each ellipse will be.


After the second day of class, I have everything I need to stitch the shippo cloud and finish the top right snow flake. There is a second snow flake at the bottom but it's located behind cords so will have to wait till later.


Wednesday, April 10, 2019

Japanese Embroidery Phase 2-3 - Class Day 1

After months of waiting, the first day of class was finally here. As always, travelling with Japanese embroidery means a lot of baggage. My frame is in the artist hard case, the stand and lamp in the blue yoga bag, and all my tools and technical material in the black tote bag. Lunch is in the pink tote. We're really lucky that one of our members has a big enough space to accommodate all of us.


Before coming to class, we wanted to be able to jump right in. So homework had been given to us, which I did over the last three months. Our teacher was very happy we came prepared, as it meant we wouldn't be spending the first day and a half doing foundation work.


We started with sayagata. The purple foundation covered up the lightning pattern and needed to be put back in. There are different ways to do it, but we used the tracing paper method. The design lines are drawn on the paper, which is then tacked onto the fabric.


From there were stitched the design lines using couching silk.


Once we were done, we could tear the paper away and stitch the design using the actual thread we want to use. In this case it's a pretty silver twist. I really like the combination of the two colors together.


After a full day of class we have a cloud that is on it's way to be completed. I still have some lines to stitch and the entire thing will have to be couched down after, but it's well on it's way.


Before we left, we were given homework to do so we would be ready to start the shippo cloud the next day. We needed to cut ellipses which will act as our padding. More on the next post.


Wednesday, April 3, 2019

March TUSAL


Oops, I forgot to post my TUSAL. Last month I worked more on my Japanese embroidery (threads go in a separate container) but I did start a new piece, which is where all that black thread is from. I'm trying to remember where the green and blue thread came from. I think it might be from the mermaid piece I'm working on but not sure...

One more day till our Japanese embroidery class. Next week I should have plenty to share on my Hiogi fan.

Monday, April 1, 2019

Japanese Embroidery Phase 1 - Cords

I had a very productive weekend. Woke up early on Saturday and spent a full day finishing those cords. Looking at it from afar, there are some areas that could be better, but they came out pretty good and I'm satisfied.


Since I was on a roll, I just kept going and finished the iris leaf blades as well.


At this point, my piece is 90% completed! I just have a ton of veins and stems left to put in.


I went to a concert that night (went to see Muse and they were awesome!), so I pretty much slept in the next day. Around noon, I told myself I really should do something with my day, even if it's just twisting threads.

The stems and veins are basically karayori thread couched down. It's the same thread I used for the outline of the paper. The thread is tightly over twisted, dampened with water and set aside to dry. Which is why in the next picture you see a dampened cloth. If you look closely, you'll see I already have a strand wound around the bars of my frame waiting to dry. It doesn't take long to dry but I figured I'd make a few at a time.


While those threads were drying, I made couching thread in the same color.


Since I had a few good hours of sun left (hurrah for the return of spring), I figured I might as well start the veins on the iris leaves.


Every time I'd finish a section, I'd think "should I stop here?" but then decide I can squeeze a bit more time. Next thing I knew, all the blades were done and I ran out of couching thread. It won't be long now, I just need a few good days of stitching and it will be done. I'll have to start thinking about the finishing process.


I'm really happy I'm so close to finishing my piece. This way when I start class on Friday for the next phase piece I can do it with a clear conscience. I can't wait to get started on Hiogi.