It's now time to fill the inside and attach the strap.

Making the lining:
For the lining, my teacher sent me a template.
1. For this step, I needed some cardboard. I used an empty ziploc box, but if
I could do it again I would use something a little thicker like a cereal box.
Using the template, I traced the curve at the top but stopping 1 cm away from
either side. I then drew a second curve 1.5 cm away from the first one. These
two pieces of cardboard will help stabilize the edge where the magnetic clasp
will be placed.

2. I used the template to trace the shape of the lining with darts. I trace a
second outline around it to add a 1 cm seam allowance. This is done twice.

3. Once the fabric is cut out, glue is applied to the edge of the fabric and
folded over the pieces of cardboard. Set aside to dry.
Note: If I had to do this again I would iron on a piece of interfacing on the
fabric before gluing the cardboard piece. It will be clear why when you see
the picture in the next step.

|

|
4. Once the glue is dry, I used a sewing machine to stitch the edge going thru both fabric and cardboard. As can be seen in the picture below, the fabric was so thin the glue is showing through to the front. Not ideal but I can get over it.
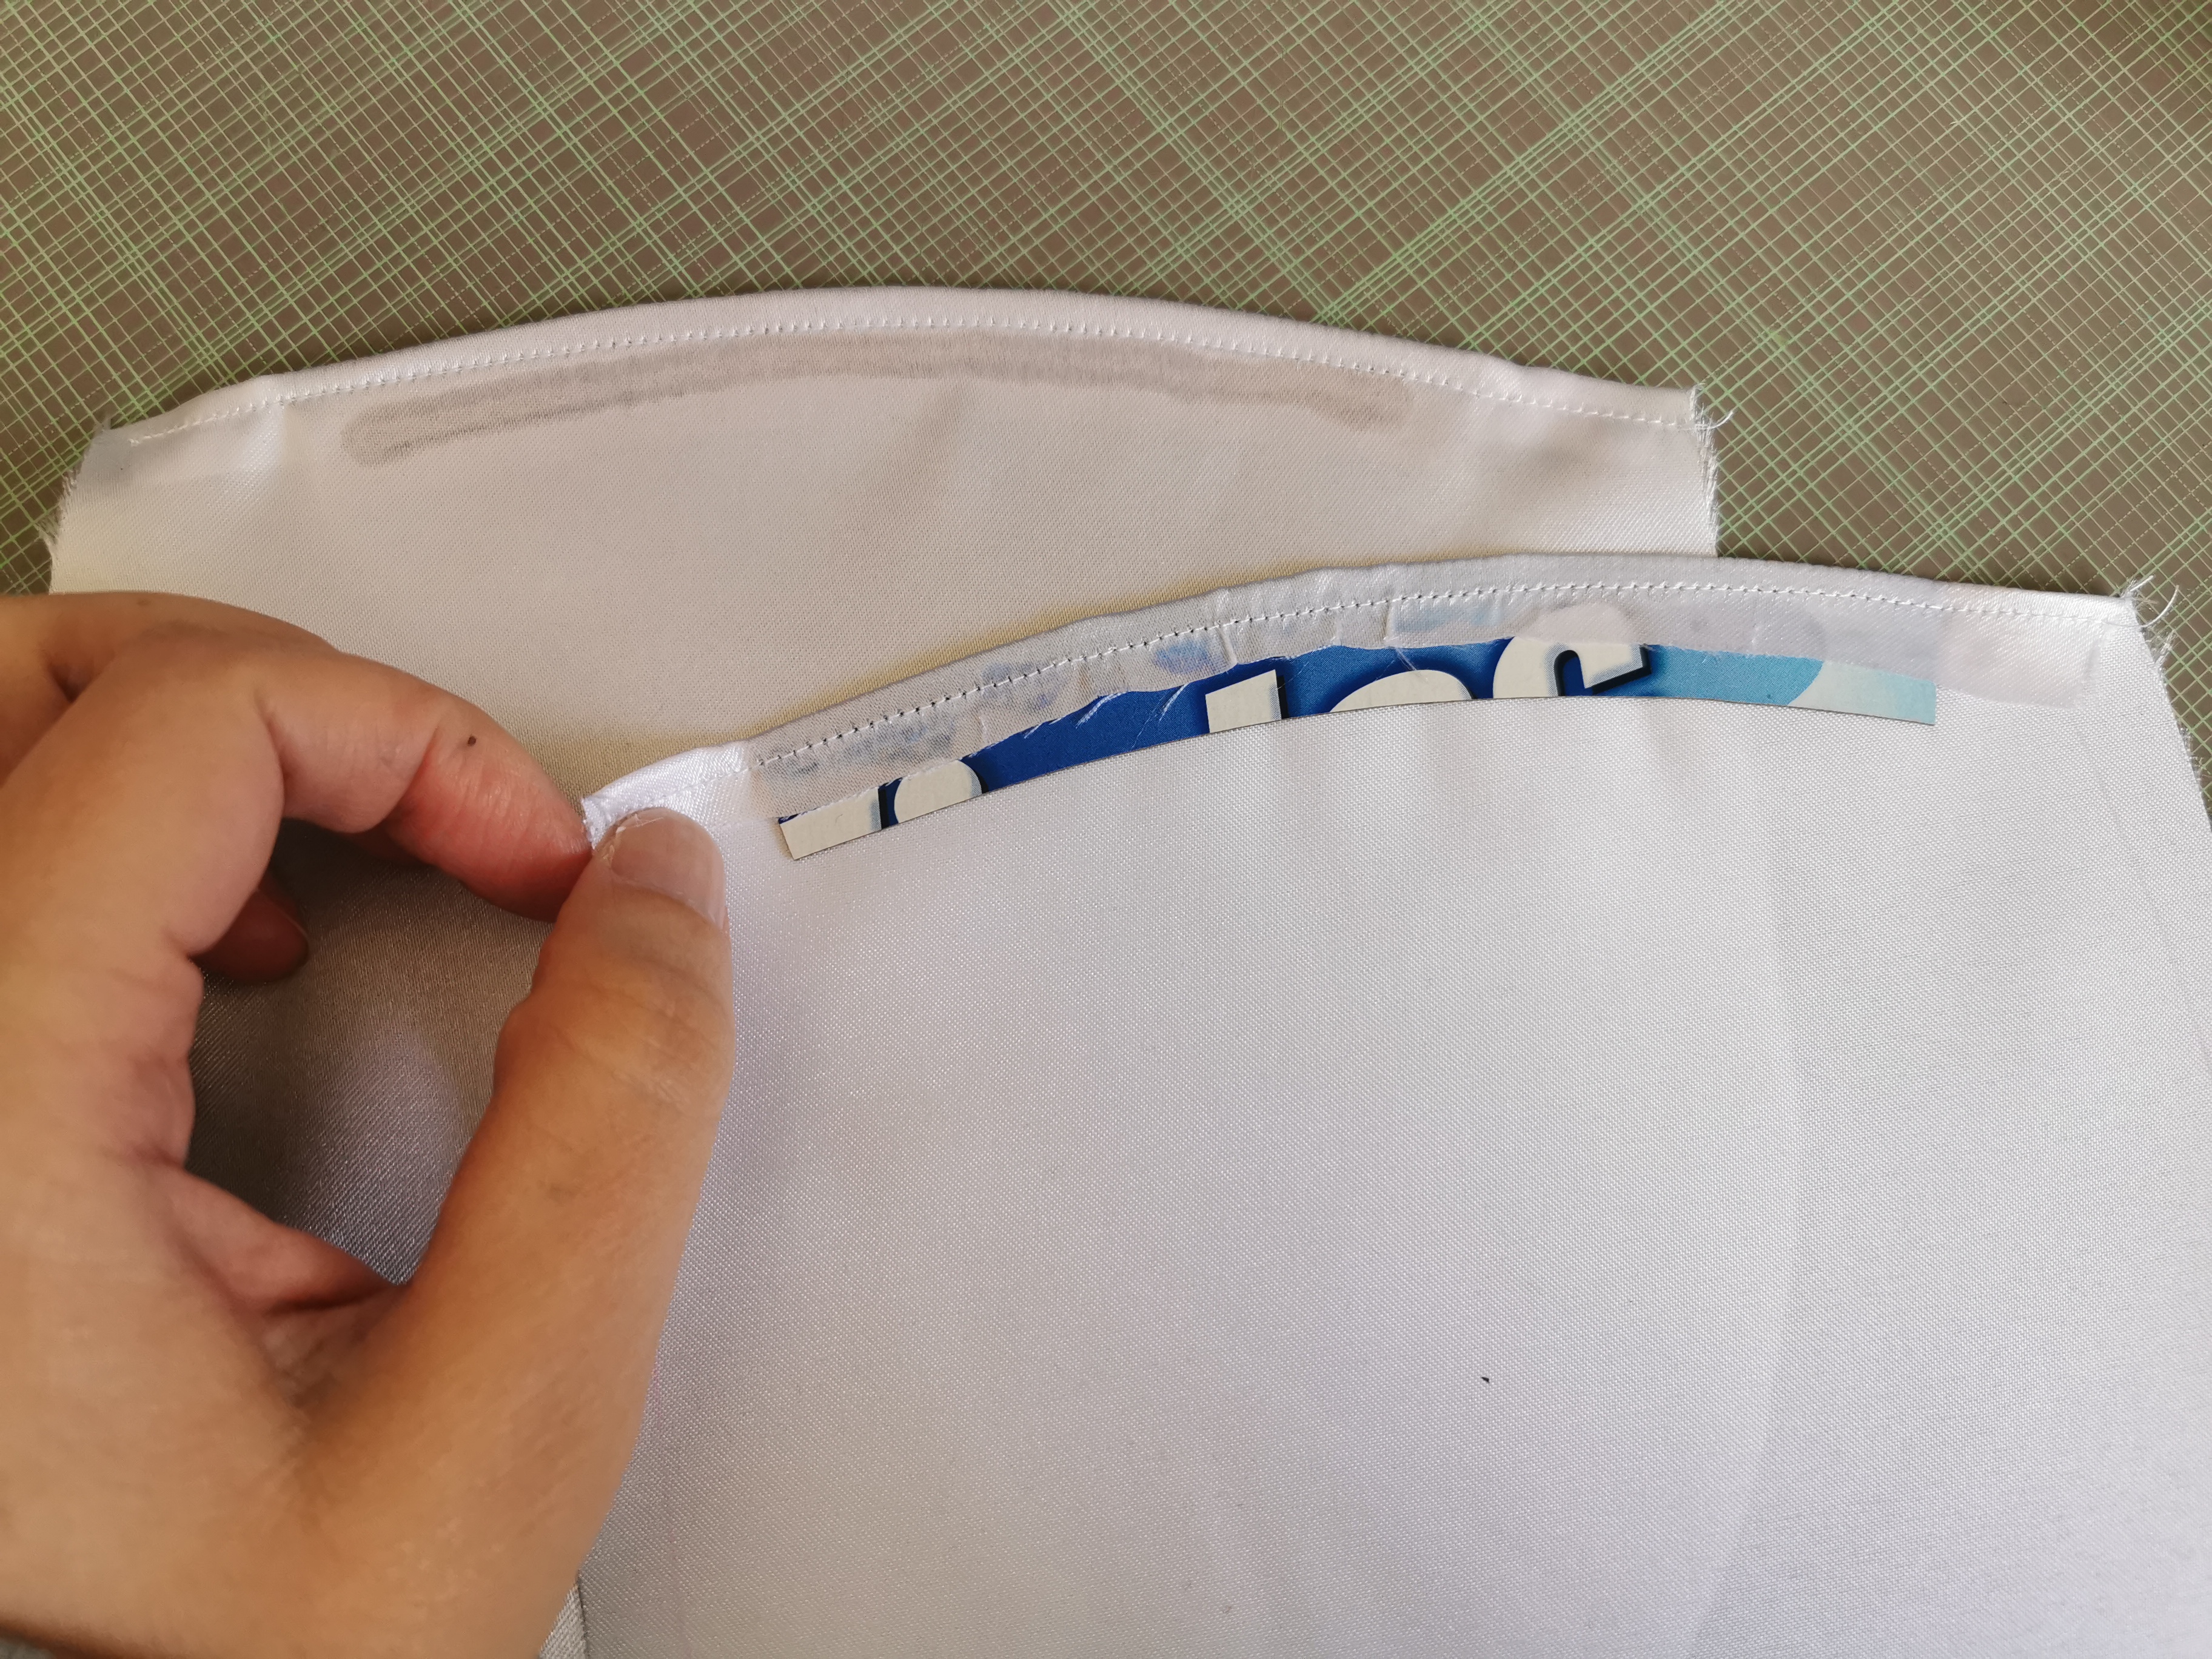
5. Now that the edge is stable, it's time to put in the magnetic clasp. The
clasp is made up of 4 pieces: two make up the actual clasp and two washers
that are used to keep them in place from the back. I used this
tutorial
to attach the clasp. First step is to find the center on the top of the opening.

I aligned the little circle of the washer to that marker and used a pen to draw in the rectangular lines. These will be the cutting lines.

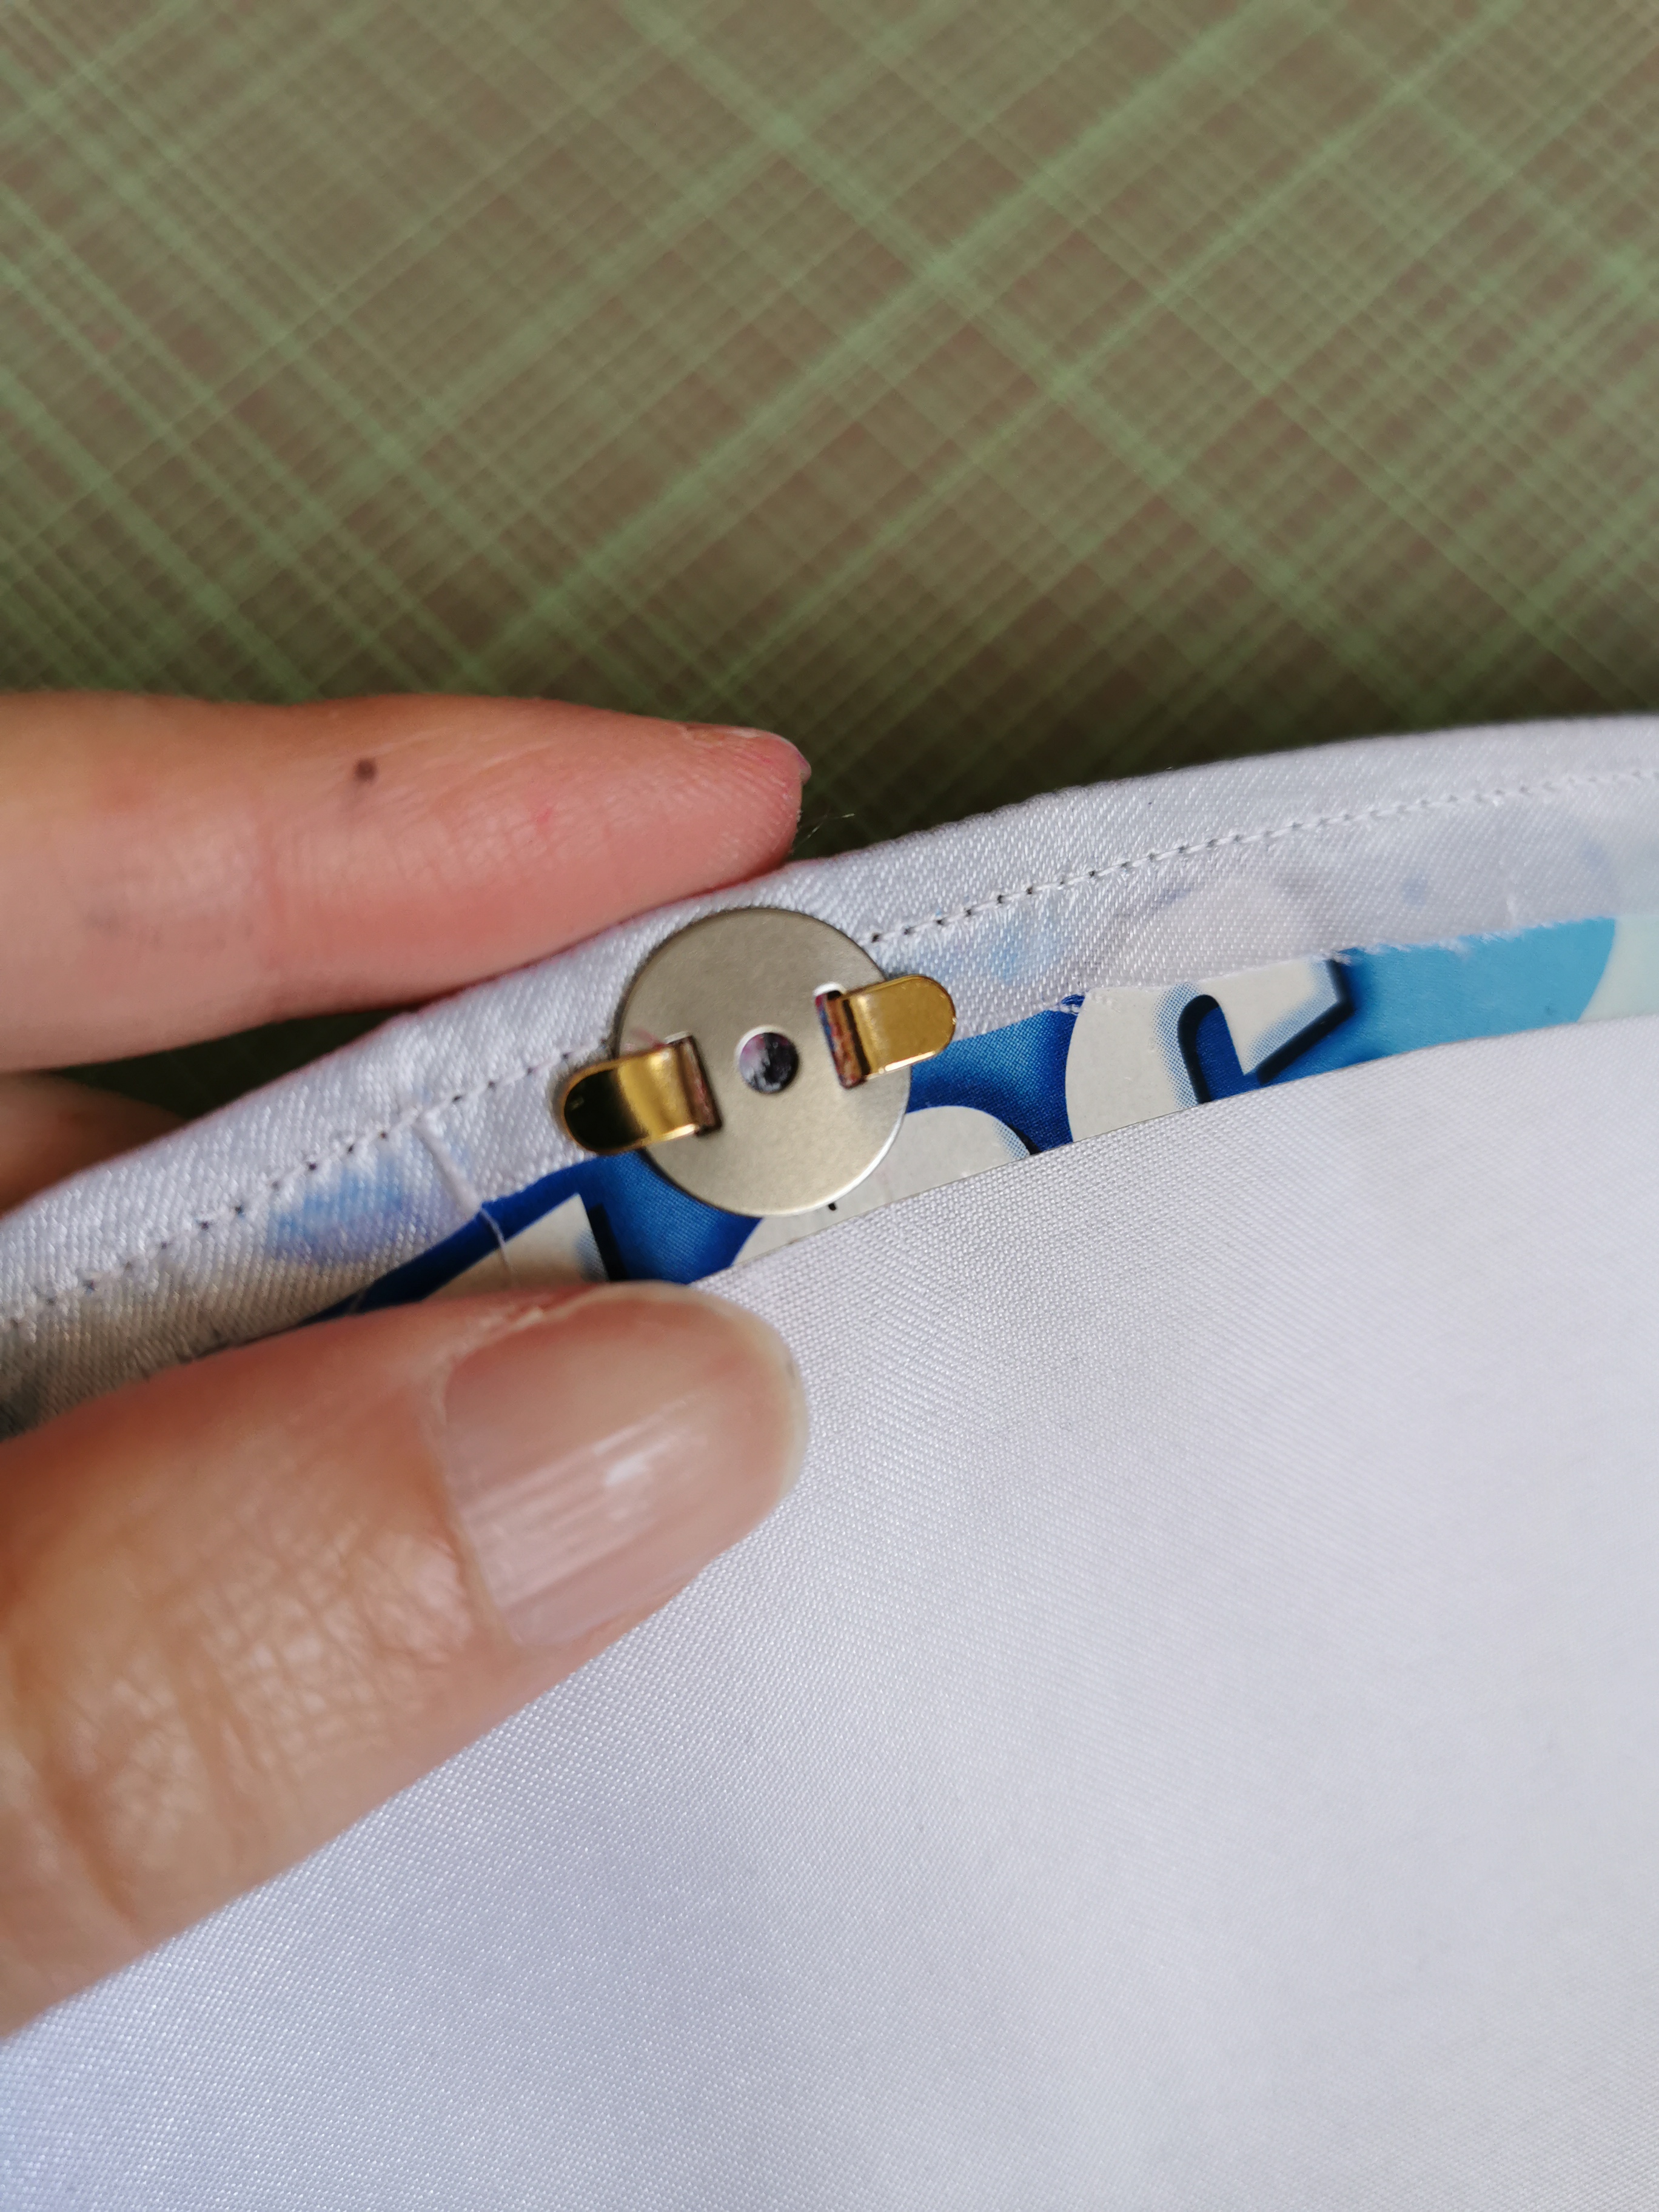
Using an x-acto knife, I cut through those lines enough that I could push
the prongs of the magnetic clasp through them.

|

|
Here's what the two pieces will look like when the clasps is in.

The final step was to place the washers and fold the prongs. I used a hammer
to really flatten them.
6. Using the inner outline as a guide, I used my sewing machine to sew the two pieces of lining together with
the outside facing in and leaving the top open.

7. The last step was to stitch the darts the same way they were done on the
beaded piece.

|

|
At this point, you're going to want to check that your lining will fit in
your pouch. This is also the point where you may or may not panic (like I
did) when you realize that your lining might be too big for your pouch. But
wait, don't panic! There's a reason that bulk is there and you don't realize
it until this next part is done.

|

|
Attaching the strap:
My kit came with a white and gold cord that is used for the strap. I've seen
some stitchers replace this cord with a beaded cord they made up themselves
but I decided to go with what's in the kit as it's a learning piece.
1. The ends of the cord come taped to keep it from getting untwisted. Before
removing it, I used a threaded needle to pierce through the cord and wrap
around it. I did this a few times to keep it together. Don't end the thread
yet! Once that's done, I removed the tape and untwisted the cord to flatten
the ends.

2. Using the needle that is still attached to the cord, I sewed the cord to
the inside of the beaded pouch. It's important to leave small stitches on
the outside part of the pouch (in between the beads) so they would not be
visible. Once the cord end is attached, end the thread.

3. I then glued down the end of the cords. I had some pieces of cotton laying
around and I covered the glued edge with it for a clean finish. Repeat step
1-3 on the other side.

Last step, installing the lining:
I stuffed the lining into the pouch and ladder stitched it into place.

Here's what the inside looks like. Remember the extra bulk? It's just
the right amount to curve over the cord.
 |
 |
With this ends my adventure of stitching and finishing the Poppy Pouch. I was never a fan of this design and was even adamant that I would never carry it. However, it came out beautiful and I'm especially proud of my finishing skills. So I decided that for one night I will carry this purse to a special guild event to show it off before it goes into storage. I may take it out again for a future EAC seminar, we'll see.

I have now officially completed phase 3 of Japanese bead embroidery and am already thinking of the next phase (two more to go). We're thinking fall dates, I'll have more information later. I already purchased a phase 4 kit, but I'm trying to get my hands on a different phase 4 design. I'll share a picture later if I am able to get the kit.
Oh, at the very least I think it is worth carrying when you're going to meet other people who will understand...!
ReplyDeleteAbsolutely gorgeous!
ReplyDeleteThe purse is beautiful. Rather than hiding it in storage, why not display it on a stand in your dressing closet or bedroom. Then you'll get to enjoy seeing it every day.
ReplyDeleteIt's beautiful! Shame you don't like the design that much but I believe it really deserves a night or two to shine. Well done!
ReplyDeleteYour pouch looks gorgeous and I agree with Rachel. Use it when there are other craftswomen present who will apppreciate the work involved.
ReplyDeleteThis is so fabulous!
ReplyDeleteThank you for showing us your process in completing this piece. I really enjoyed being along for the ride. Your beading is lovely, and I think this is a stunning finish. Great work!
ReplyDelete