Friday, May 22, 2015

My Day With Hazel

As you know I attended a two day class with Hazel Blomkamp and the ladies of the Lakeshore Creative Stitchery Guild. It was both amazing and intense. I've never spent an entire day just stitching, but it was worth it. I learned so much from both Hazel and the girls (as Hazel called us). As it is with these things, I didn't take a lot of pictures, preferring to spend it stitching and soaking up as much information as I could.

The main topic of the class was "Using Needle Lace Techniques in your Embroidery". This is a technique Hazel adapted from an old needle lace book she had bought by accident. Using these techniques on top of traditional crewel techniques gives pieces an extra dimension. Pictured below is one of her pieces, you can see she used a cream thread to needle lace over the petals. Afterwards she passed a ribbon through the lace, giving you the illusion that it is a piece of lace that was patched on.


As part of the course, we each got a piece of fabric for us to try out the different stitches. The fabric is a cotton linen backed with voile (or muslin). We got a nice little spiral book that contains all the needle lace techniques that are described in her books Crewel Twists and Crewel Intentions. It also comes with a needle book, a packet of beads, cotton thread and two different weight dentelle lace thread. By the way, she is also working on a spiral book with all the weaving techniques she uses in her books. Let's hope she comes back to Canada for another class so I can get one.


The first day we spent it trying different needle lace patterns with the thicker weight so we would be able to see our stitches. The stitches are not that different from crochet stitches, instead of a hook we are using a needle. Hazel named the stitches to match the ones from Thérèse de Dillmont's Encyclopédie des ouvrages de dames, but a lot of these stitches have names. They are not only used for creating lace but other embroidery techniques such as Elizabethan Stumpwork.

End of Day 1

All these stitches start with us back-stitching the square and then filling them with rows of lace. We didn't want to waste our second day on back-stitching, so we had homework to do at the end of the day.

Homework done!
The next day we got the chance to try out more complicated patterns and Hazel also showed us her buttonhole and weaving technique. I didn't get much done on either (the leaf on the bottom is started with the buttonhole stitch and the circle on the left is the beginning of the weave). I was too busy talking to the ladies and just listening to Hazel.


At the end of the class Hazel walked us through how she stitched each of the take home projects. The take home projects were Dancing ThreadsThe First Sip and Jac 11. I picked Dancing Threads as my take home project, but I also bought Dancing Threads. I love the blue colors and the lace that surrounds the flowers.

Dancing Threads
The First Sip
Jac 11
The rest of the pictures are eye candy. I tried to take really close up pictures of each project as well as the other stitched items she brought with her. The kits for all these projects are available through l'Atelier de Penelope. The owner, a lovely lady named Patricia, was in the class with us and I had a fun time talking to her. I'll have to plan a trip to Quebec City one day to visit her shop. There were other projects she brought with her, but I'll have to wait before I post them. They are for her new book that she will be releasing next year(?) and it is FABULOUS and AMAZING. It's just too bad I can't show you. I am allowed to say that it will be about crazy quilts (but way cooler in my opinion).

By the way, I apologize in advance for the glare. All the pieces are covered in plastic, which is great because it meant we could pick them up and pass our fingers over them to feel the bumps created by the stitches. But it's not so great for taking pictures.


If you've made it to the end of this post, you're seeing the only picture of myself I'll probably ever post on my blog. I'm the one on the right, with Hazel right next to me. The ladies with us are Suzy (in the back) and Helene (on the left). They both belong to the Lakeshore Creative Stitchery Guild.

Thursday, May 21, 2015

May TUSAL


I have a nice thread pile for this month's TUSAL. Lots of pinks and cream with green. All the cream thread is from Fantasy Lace which has seen the most stitching time out of all my WIPs. It's such an easy project to work on anywhere anytime. I haven't really felt much like cross stitching.

Monday, May 18, 2015

Crewel Piece Finished

This week I neglected all my WIPs to finish my Crewel practice piece. Since I wasn't following any pattern for this, I decided to look for inspiration in Hazel's two books and on the Internet.

For the paisley leaf, I decided to use the Buttonhole stitch. My stitches started out a little crowded at the beginning until I got used to it. Once I got to the crest of the leaf, I realized there was no way I could keep the stitches together and still follow the curve.


Unfortunately it didn't really click until I was at the very end of the leaf.  The trick is stitch the buttonholes together, but where there is a large curve, follow the curve and then just go back and fill the empty spaces with satin stitches.


And there is it all stitch up. Some of the stitches are crowded, but it looks great all in all.


For the inside of the paisley leaf, I decided on the seed stitch. This is definitely not a favorite of mine. I'm not a very spontaneous person, so wild and random stitches are not my forte.


This next part was my absolute favorite. I was having trouble deciding how to stitch these, until I found the Romanian stitch in Hazel's book.


It's the perfect stitch for leaves. It makes a nice center line and the thread is laid in a way that there is two "different" colors on each side of the leaf. The trick is to draw a line going down the center of the leaves as a guide.


 For the last part, I decided on the padded satin stitch. I've seen this technique used in Japanese Embroidery as well as in Hazel's book. It starts by stitching evenly spaced horizontal stitches and satin stitching over them vertically.


Here it is all done :) I didn't take a picture of the back cause it's not very nice. I'm quite satisfied with it, except for the center of the flower. It was an unfortunate choice, but oh well.


Update on the Susan Bates plastic hoop. I've figured out a way to work with it. The trick is to stitch in the well. In other words, when putting the fabric onto the hoop, place it face down so that once it's framed it looks like the image above. This way the fabric is nice and taught and doesn't shift around.

Wednesday, May 13, 2015

Crewel With Hazel Blomkamp

I've been holding this in for two months, but now that it's happening soon I can talk about it. A while back Mary Corbet wrote a post on Hazel Blomkamp's kit Late Harvest and after taking a look at her shop, I've been itching to get one. My cautious self couldn't throw everything to the wind and just buy a kit (or 3), I mean what if I didn't enjoy Crewel. I settled for buying her two books (there are excellent reviews on Mary Corbet's site here and here).


However, the more I looked at the books, the more I wanted to try it. I was also feeling kind of down for not being able to attend this year's EAC seminar being held in Calgary (I spent that money to go to Cuba :P). Then I find out a great piece of news: Hazel Blomkamp was making a stop in Montreal to teach a class with the Lakeshore Guild. After a quick search, I find out I passed the registration deadline (by one day), but I figured I could still place an order with her and save myself the shipping cost from South Africa. So I contacted Hazel, who in turn put me in contact with Pam, the person organizing the class, and I was able to register for the class. I was floating for days after that. I can't believe I'm getting this amazing opportunity.

There is a little worry that I might not have the experience necessary for the class, but I refuse to let that stop me. The class is being held next week on May 19 & 20 (I even took the days off to attend), so I decided to create a little project for myself to practice.

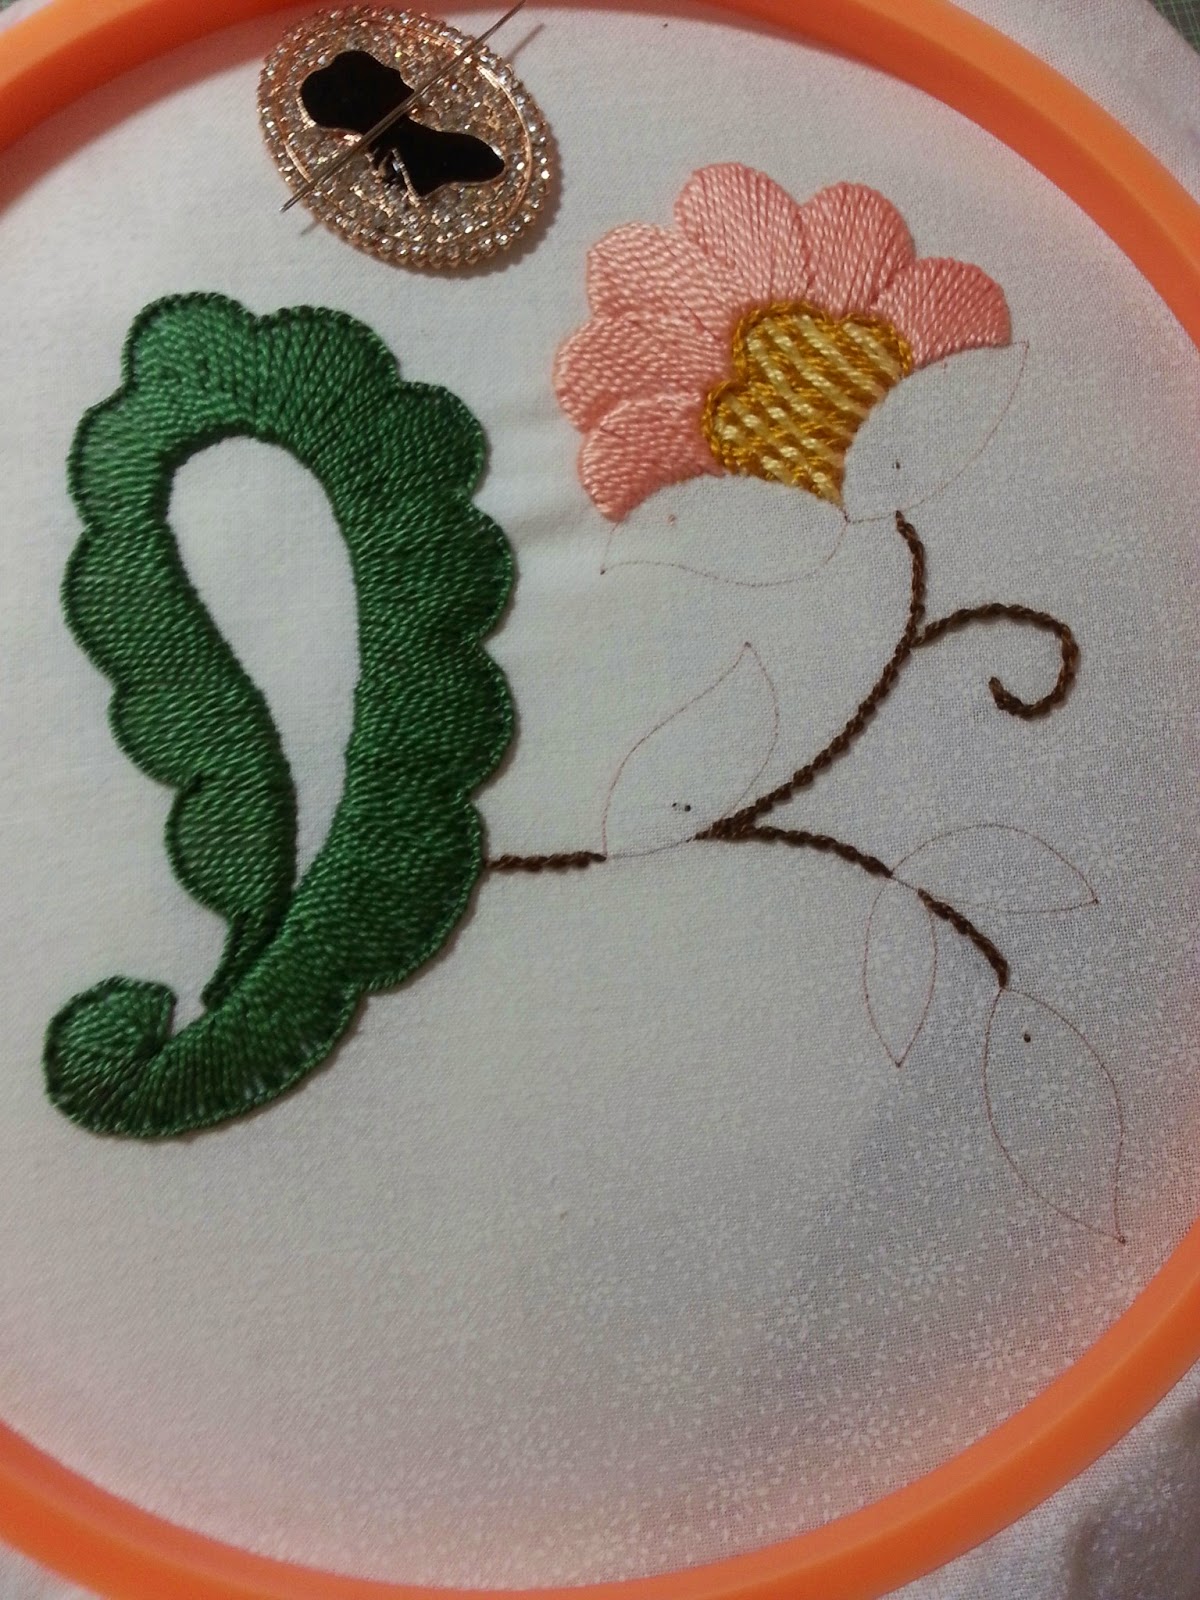
This pattern is free from this website here. It's nice and big for what I need and I'm using DMC #5 perle cotton so that I can see my stitches. It's traced on fabric I found at a shop, using a Sepia Copic Marker. I have no idea what the fabric is, but it has a nice shine to it and tiny flower motifs that are only visible in good light.


I haven't don't much so far. I tried one of the woven patterns described in Hazel's book for the center of the flower. It started off okay, but you can see that I lost my way once I started the horizontal part. I'm thinking I picked the wrong weave pattern for the thickness of the thread. I think I'll try it again but in a square figure next time, just so I can get used to it.

The petals are done using the satin stitch which I LOVE, until I have to figure out where to pierce the fabric lol. I started from the second on the right and you can see that it started out okay, but then I got tired as I got to the last one on the left. I think I should have stopped at the second one. Because when I went back later to stitch the first one on the right it looks great.

The stem is stitched with stem stitch (duh). I still have to decide how to do the rest, but I do want to try the seed stitch and buttonhole stitch. There is an excellent page that describes the basic crewel stitches here. I also want to try the lace motifs described in Hazel's book. This is actually the main topic of the class she will be teaching next week.


These notes are for me: I HATE the Susan Bates hoop. My first frame was a Susan Bates plastic hoop, I didn't like it then and I still don't like it. It's the main reason I bought my first frame and q-snap and why it took me so long to trust hoops again. I can't get it to stretch the fabric properly, it keeps sagging and puckering on me as I stitch. This could either be caused by the fabric being thin or just plainly the hoop. I'll have to ask Hazel since she's the one who recommended we get one for the class. Also, when using satin stitch, I should be split stitching NOT back stitching the motif and then covering it with satin stitches.

I'll do another post once I've attended the class.