Friday, February 18, 2022

Poppy Pouch - Halfway there

Well not really halfway there. There's still so much to do (twice!), but we have had 3 out 6 lessons so far.

Since my last post, I got busy putting in the vertical lines. It was important to get that first line in as straight as possible. So using a blue pencil I drew a line down the center and that became my guideline for the first row. 


The rest of the rows are stitched against that first one and were nice and straight.


For the first two weeks I did nothing but work on these vertical lines. It got old very fast.


In lesson two, we were starting the flower so I needed to put in the bijoux at the center. The beads used at the center are margarita bead crystals. In our kit, we get a random selection of crystals but I really want the front and back to match, so I went shopping.


As Swarovski was no longer selling to hobbyists, I decided to try out a new crystal brand sold by Artbeads called Prestige. Now that I've seen them first hand, I think I'll be quite happy to start using them. The Prestige vitrail (dark green rainbow crystal) was a little darker than Swarovski's but not enough to annoy me. Luckily I bought two of each crystal and just swapped the ones in the kit for the Prestige.


With the centers in, I can start playing with the pretty blue beads. There are three shades plus a transparent white not pictured below.


But first I needed to add in my padding. A line of beads is stitched inside the petals following the curve before it goes downwards. I again used my blue pencil to draw a guide so I didn't lose my way.


As part of my homework for lesson 2, I needed to put in the first row of beads. It took me a few tries before I was happy with them. I was told my lines should be longer, but I'm not crazy about having long lines of beads that are not couched (as these lines are going over padding, only the last bead or two are couched) with a possibility of getting them snagged and the thread snapping.


During our third lesson, we covered how to stitch the inside of the petals. The aim is to recreate long and short stitches using beads. The stitches also needed to be loose and free, not super packed. That second one is very important as one of my teachers biggest regret is how packed her flowers were. Having seen her piece and some others, I agreed with her.

However, you know me, I'm not good with random or loose. So this took some practice, but I think it worked. Both Cecilia and I were very happy with how the petal came out.


Now that I've figured out how I want my petal to be stitched, I needed to plan where I want the colors to go. So I took out my coloring pencils and tried to figure out where my shadows would lay.


I think it's working, but I'll find out when I get more petals in.


With the two petals I have in, I have enough done for the next lesson which covers the leaves. This will give me time to catch up on the other side, which is feeling very lonely right now.


However, I wonder if it is more prudent to complete the poppies on the first side to make sure I like how it comes out before replicating it on the other side. Decisions have to be made.

Thursday, February 10, 2022

January TUSAL


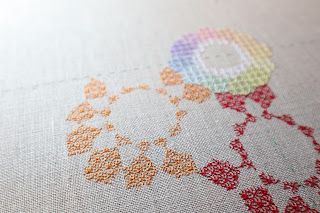
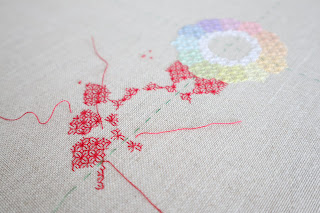
First TUSAL of the year and I'm already late. I was hoping to show off a pretty ORT picture this month from all the pastel colors in my Contrast Color wheel but it all got snowed by the threads from Poppy Pouch. So here's a picture of the color wheel itself.


This piece is more work than I expected. I finally completed the orange on the weekend and am now stitching in purple. I felt guilty of not working on my Poppy Pouch homework but I was missing working on counted work. I'll make up for it this weekend, we're having lesson 3 on Saturday.

Wednesday, January 19, 2022

Poppy Pouch - Start

First class of the new year, Japanese bead embroidery! I've had my kit for months and have been eagerly waiting to start. This piece is called Poppy pouch and is the phase 3 design in the curriculum. In this phase we learn how to pad and "needle paint" with beads.


When you get the kit, it comes with all the beads (including pretty crystals) and the hardware to finish the pouch. I'll have to provide my own lining and interfacing later.


During our first class, we set out to put in an outline. This step is very important to ensure the overall shape is consistent. You can't trust the printed outline as it distorts when the fabric is stretched on the frame.


It's even more important in this project as we have two sides to stitch and we want the final size to be the same so they would fit with each other.


The second thing we did in class, is start the beaded outline. This is the same process we followed in Calm Flow. Cecilia did spend some time showing us different ways to string the beads if they came on a hank. However, since mine came in a bag this time around, I used the method she taught me in the previous phase.


In this piece, we have a few things to take into consideration that is different from the last design. Calm Flow had curved corners, but in this one we have sharp corners to take into account, as well as points. The points are what will allow us to finish the pouch with a curved bottom and will be cut. It's also not efficient to end the beads every time, so a method is used where the "empty" thread is carried around the point and couched down.


I had one more outline to put in, more like a guideline, to separate the flower area from the vertical lined area. Notice how the outline recreates the petals and leaves.


As I'm the type of person who dislikes stitching the same thing more than once, I decided I would tackle both sides at the same time. This ensures I don't end up with what amounts to the same piece to stitch a second time.


Homework! For next class, I need to have the following completed or started:
  • Beaded outline - done for both sides
  • Put in guideline - done for both sides
  • Stitch center of flowers (bijoux)
  • Start the vertical lines (to and fro technique), basically couching lines of beads
I have one more weekend before the next class so I have high hopes.

Wednesday, January 5, 2022

Blackwork Contrast Color Wheel - New Start

It's the first start of the year! Back in 2020, I stitched this Color Wheel by Jen Goodwin (you can see the posts here).


Since releasing this design, Jen worked on a second color wheel with contrasting colors but with a more complex shape pulling ideas from her studies in Islamic Geometry. It tool a long while for her to get the shape accurate on linen as she's working with straight lines versus the more forgiving curves. But it's finally here!


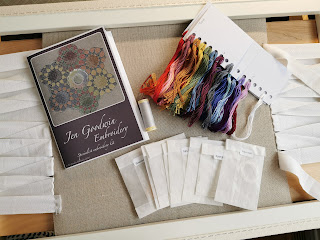
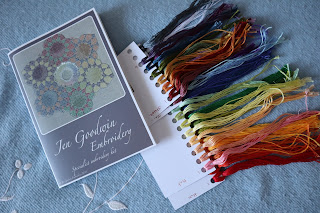
This design doesn't require any outlines to be transferred before starting. The kit comes with a graph chart showing exactly where each stitch should be placed. Just find the center of your fabric and start.  There are three different blackwork patterns to stitch, one for each family with the tones and shades sharing a pattern that is more layered.


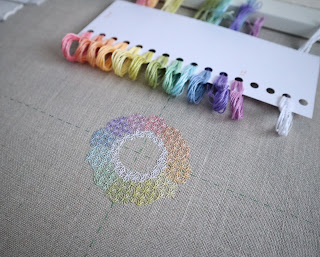
The center starts with the tint color families and I'm just in love with these pastel colors. The blackwork pattern is stitched with a single strand of DMC thread. In the first circle, each color area is so small it only needs about a strand or two of threads to stitch. So I have plenty of threads left to stitch a second wheel.


Once the center is in, I can use it as a jumping point to the next color.

I'm trying to decide how I will work through this piece. The overall shape of the design is a hexagram and I could stitch one complete point at a time, or jump around the entire piece and put in the hues, tones and shades. Right now I'm in the process of stitching with the first hue color, so I still have time to make a decision.

Saturday, January 1, 2022

2022 Goals

Looking at my objectives for 2021, I did pretty good. Especially considering I completed two Japanese embroidery pieces this year.

  • TUSAL posts on the last day of the month --- DONE
  • Finish the Colorwheel by Jen Goodwin (blackwork) --- DONE
  • Finish Tracery Dragons by Teresa Wentzler --- DONE
  • Stitch and hopefully finish phase 2-3 piece Hiogi Fan (Japanese embroidery) --- DONE
  • Start phase 4 piece Karahana (Japanese embroidery, goldwork phase) --- DONE and completed
  • Start phase 2 piece Flow Folio (Japanese bead embroidery) --- DONE and completed
  • Start Goldwork Compass by Cynthia Jackson (goldwork) --- DONE and completed
  • Stitch (and complete?) Blackwell Roundel by Jenny Adin-Christie (metal and silk work) --- Not even close
  • Stitch on Dolcetti by Katherine Drummond --- Not even close
  • Finish Elizabeth: A Sampler Doll Pincushion Maiden and Trunk by Giulia Punti Antichi --- DONE
  • Learn a new technique - Korean traditional embroidery --- DONE, I just realised I never shared anything on this piece. I'll remedy that in the new year :)
  • Older WIPS.
    • Complete Hedebo Starburst by Jette Roy Finlay-Heath (Hedebo) --- Not even close
    • Stitch the hemstitch border on Donna M. Olson's Fantasy Lace  --- Not even close
    • Finish Katherine Drummond's Romantic Rosebuds  --- Not even close
    • Finish Annie Penin's Fleur de Sakura  --- Not even close
This year's goals will be:
  • Stitch (and complete?) Kurenai-kai special advanced class piece Peach Blossoms and small bird (Japanese embroidery)
  • Start phase 3 piece Poppy Pouch (Japanese bead embroidery)
  • Start phase 5 piece Himotaba (Japanese embroidery)
  • Start phase 6 piece Eternal Grace (Japanese embroidery)
  • Start Contrast Color wheel by Jen Goodwin (Blackwork)
  • Kurenai-kai special advanced class piece Maple leaves and small bird (Japanese embroidery)
  • Stitch (and complete?) Blackwell Roundel by Jenny Adin-Christie (metal and silk work)
  • Stitch (and complete?) English Whitework Sampler by Darlene O'Steen (whitework)
  • Stitch on Dolcetti by Katherine Drummond (Punto Antico)
  • Older WIPS. Putting these back in, but I think a few of these will be here for the last time.
    • Complete Hedebo Starburst by Jette Roy Finlay-Heath (Hedebo)
    • Stitch the hemstitch border on Donna M. Olson's Fantasy Lace
    • Finish Katherine Drummond's Romantic Rosebuds
    • Finish Annie Penin's Fleur de Sakura
Since finishing Hiogi, I'm all fired up to get to the next one, so it looks like this year will be all about Japanese embroidery. I have one class starting in January, another in April and a third in June. I still need to figure out timing for the fourth piece, so to be determined later. Still plan on working on other types of projects as Japanese embroidery takes a lot effort and having easier projects will be good. I'll play those by ear.

Friday, December 31, 2021

Looking Back at 2021

2021 was another strange year. I switched jobs twice and we're spending a lot of time at home. Because of this I was able to complete two of my longest WIPs. I'm most proud of how I finished Bramble and the Rose. I get to admire it every time I go into the living room.

Tracery Dragons by Teresa Wentzler
Bramble and the Rose by Ink Circles

I bit the bullet and made a doll...

Elizabeth by Giulia Punti Antichi

and an elephant.


I completed two Japanese embroidery pieces and will soon be a phase 5 students.

Karahan - Phase 4
Hiogi - Phase 2/3

Finally managed to find a Japanese bead embroidery teacher. I was so happy to be able to move on with my studies and will have more in future.


One of my favorite pieces from this year is the beautiful blackwork Color Wheel by Jen Goodwin. It was such a joy to stitch and look at all the pretty colors.


Covid opened up a lot of opportunities for us to take classes with teachers both near...

Mariner's Compass by Cynthia Jackson
Armillary Sphere by Cynthia Jackson

And far. The biggest opportunity Covid brought me was the chance to take a class with a professional Japanese embroiderer in Japan. This would never have happened under normal circumstances.

Peach Blossom and Bird by Kurenai-Kai

So even though I was stuck at home with no where to go, I was able to go very far thanks to social media and Zoom. I look forward to more learning opportunities in 2022!


Armillary Sphere - Lesson 5 & 6

It was a close call but I made an effort this week to get Armillary Sphere completed as I did not want to drag this project into the next year.


It's a really simple stitch, just repeat lessons 2 and 3. Unfortunately, I'm the type of person who dislikes doing the same thing twice. Once I started though I was able to get everything done in about two sessions.


Turns out the stitching was the easy part.


The hard part was cutting the piece out and stitch it on. I had a very hard time getting a close trim.


Now that it's done I really like the effect. It's currently sitting on my desk, propped on the wall and I enjoy looking at it.


With this, the second piece in the series is completed. Crossing my fingers the third design, the Astrolabe, gets released next year. So I'm going to hold off on framing this one until I stitched the final piece.