With my fabric stretched on the frame, I'm ready to start. Here are all my materials. Except for the embroidery tools that I already owned, I bought all the metal threads, felt and fabric from Alison Cole. In order to prepare, last year I made a colored drawing of the design and traced all the different pieces as well as the design itself on tracing paper.
To transfer the design onto the fabric, I used the same method as Pearl Butterfly which is a dressmaker's carbon paper by Clover. Before starting, I tried out different sheets to pick a color that will show up best against my fabric. I ended up going with the yellow.
I found the center of my fabric and positioned the outline as straight as I could. Below the frame is 2" binder which gives me a firm surface to draw on.
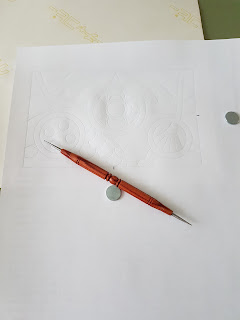
I then drew over the lines using a stylus, making sure to be very firm so the carbon transfers onto my fabric.
Here is the design transferred onto the fabric. It is very faint and I had a very hard time seeing it. I think I will try a different method next time. Natalie has offered to show me the prick and pounce method. I will take her up on her offer for the next project.
If you look very closely you'll notice that the sky is on the right side. I later realized that I traced the design on the wrong side (too eager to start). If this ever happens to you, the carbon can be brushed off using a soft brush. So no harm no foul, just brush it off and try again.
I tried to use the same transfer method for the felt, but the carbon wouldn't transfer. The felt was too soft.
I ended up using a ball point pen and just went over the outline hard enough to pierce the transfer paper creating guide lines that I later went over using a pen. Basically I used a rough version of the prick and pounce method.


Felt is a real trial to transfer design lines to, and I'm afraid I have no better solution than the one you arrived at!
ReplyDeleteFelt is tricky! I’ll let you know what the RSN has to say on it later this year. But from sticky beaking at other students I think they cut out the design in paper and use that, a bit like dress making.
ReplyDeleteMaybe try Frixon pens. The ink disappears with the heat of an iron. You can get Frixon pens at any office supply store. I use them for quilting a lot.
ReplyDelete